Update fields in text boxes and shapes
Update fields in the main document
To update fields in the document, do the following:
1. Select a field, a paragraph or block of text with a field, or an entire document (by clicking Ctrl+A).
2. Do one of the following:
- press F9,
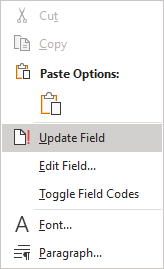
- right-click on any of the fields and select Update Field in the popup menu:
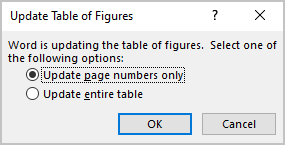
If there is a Table of Contents, Table of Figures, Bibliography, Table of Authority, etc. in a selection, after updating fields, Microsoft Word shows the message dialog box:
 or
or
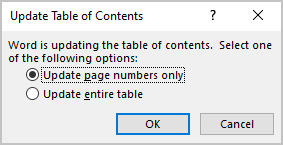
In the dialog box, select what you need to update. We recommend selecting the Update entire table option always. After selecting, click OK to update an appropriate Table.
Notes: You will see a dialog box for every Table in a selection.
Unfortunately, you can't update fields in text boxes and shapes this way.
Update fields in text boxes and shapes (workaround)
The different embedded objects like text boxes and shapes can also contain fields. For example, you can have caption numberings in shapes or text boxes (see how to create captions for figures, how to create captions for photographs):
 or
or

When you update all fields in the document, fields in shapes and text boxes are not updated automatically.
To update fields in shapes and text boxes, do one of the following:
- Select every shape or text box one by one, select its content (by clicking Ctrl+A), and update fields in each object (by pressing F9).
- Use a macro to update all fields (we don't recommend macros because of security issues).
- Update all fields by using the following workaround:
1. Select or ensure that the Update fields before printing check box is selected:
1.1. On the File tab, click the Options button:

1.2. In the Word Options dialog box, on the Display tab, under Printing options, select the Update fields before printing check box, then click OK to close the dialog box:

2. On the File tab, click Print (or press Ctrl+P):

You don't need to print the document – only tell Word that you want to print!
3. Return to the document view by clicking the Return button:
All fields in the document should be updated.
We strongly recommend checking a document at least visually after changes!
