Format tables in PowerPoint
When you create a table from the Insert Table dialog box or the Table button, the table is automatically formatted with one of the preset table styles.
Format the table
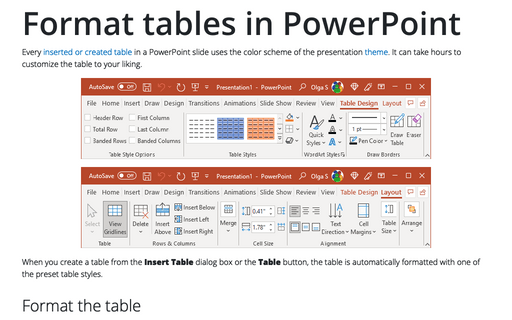
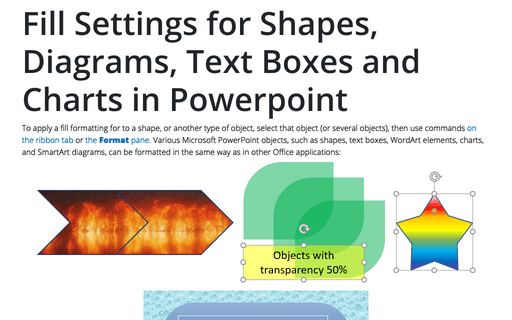
You can format an entire table or individual cells by using the commands on the Table Design and Layout tabs, which appear after positioning the cursor inside the table or selecting a table element (table is active):


Working with tables in PowerPoint is almost the same as working with tables in Word. See also Select table elements in Word.
Modify table style options
On the Table Design tab, in the Table Style Options group, select or clear any of the six options:

- The selected Header Row checkbox determines the first row of the table contains column headings.
- Select the Total Row checkbox to specify the last row for summarizing the above rows.
Note: PowerPoint tables don't support formulas. You can create an Excel spreadsheet on a PowerPoint slide to use any Excel formulas and functions.
- Select the First Column checkbox to determine the leftmost column of the table contains row headings.
- Select the Last Column checkbox to specify the rightmost column for summarizing the earlier columns.
- The Banded Rows and Banded Columns options alternate the background color of rows and columns (see how to change the background color for the selected cells below).
Note: Certain Table Style Options may have a different effect depending on the Table Style you've chosen. You might need to experiment to get the look you want.
Apply a predefined Table style
When you create a table from the Insert Table dialog box or the Table button, the new table is automatically formatted with one of the preset table styles used by default (see below for how to change the preset style used by default). Styles include a variety of borders, colors, and other attributes that give a table a professional appearance.
PowerPoint offers several predefined styles you can use for the table. You can change the table style if desired or remove all styles from the table, leaving it plain black and white.
To choose any of the predefined styles, do the following:
1. Select the table.
2. On the Table Design tab, in the Table Styles group, in the Table Styles gallery, click the More arrow to see the complete list of styles:

3. Select the table style you prefer:

The Table Styles gallery includes four categories of styles:
- Best Match for Document includes styles use theme colors applied to the slide,
- Light, Medium, and Dark include styles with few, medium, or more formatting.
Notes:
- To change the predefined style to use by default, right-click the thumbnail you prefer to be used by default, then select Set as Default in the popup menu:

- Predefined styles vary depending on the Theme applied for the presentation or slide (see more about Themes). For example, if the Facet theme is applied:

4. Point to table styles to preview their effects on the table.
5. Click the thumbnail to apply the corresponding style.
Note: The selected style overrides the table's previously added style changes.
To remove all styles from the table, on the Table Design tab, in the Table Styles group, in the Styles Gallery, click the More arrow, then select Clear Table:

Apply the border styles
See how to change the color of the table borders in PowerPoint.
Apply background colors and shading
To fill one or more cells with a specific color, select the cell or cells, then do one of the following:
Using the ribbon tab
On the Table Design tab, in the Table Styles group, click the Shading button to choose a fill type from the color picker:
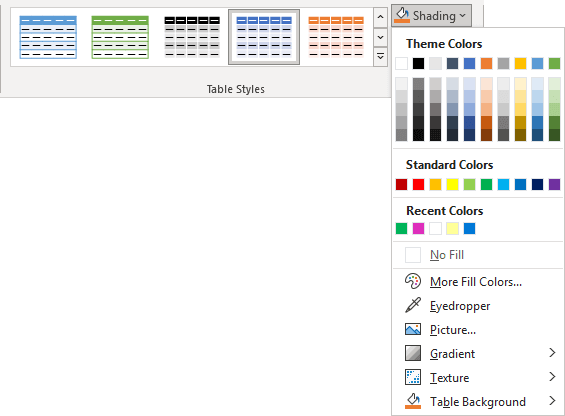
- Select one of the six shades of each of the 10 theme colors in the Theme Colors palette. Colors in this palette depend on the current Theme.
- Select one of the 10 standard colors available in all Microsoft documents in the Standard Colors palette, regardless of the theme. The colors in this palette are the same on all computers.
- Select any of the non-standard colors you have used recently if there are any in the Recent Colors palette.
- Click No Fill to make the object transparent.
- Click More Fill Colors... to use non-theme colors (see how to apply a solid color for more details).
- Use Eyedropper to choose the color from any other object on the slide. To do so, follow the next steps:
1. Click the Eyedropper. The cursor changes to the shape of an eyedropper.
2. Click any element on the slide to select that color:

- Click Picture... to insert a picture as a texture for the selection:
For example:

- From the Gradient list:
- Choose No Gradient to remove gradient filling,
- Select the desired gradient style from the Light Variations or Dark Variations:
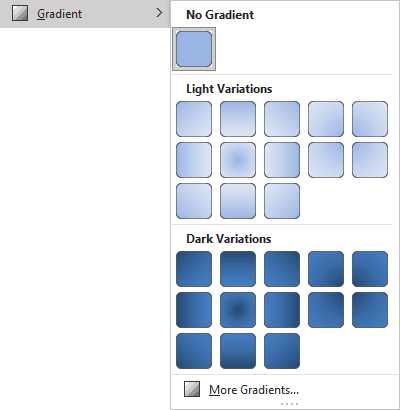
Note: You can see another set of variants if the selection has filling already:

For example:

- Select More Gradients... to open more gradient options. See more about how to work with gradients.
- From the Texture list, choose any of the 24 predefined textures:

Or click More Textures... to open the Format *** pane with more fill options. See more about how to use a texture fill.
- Using the Table Background list, you can apply a solid color fill to the entire table, which differs from the fill applied to individual cells:

The table fill color is only visible in cells with an individual fill set to No Fill (or a translucent fill, in which case it blends).
For example:
- The table fill color is set to solid color Blue, Accent 1, Lighter 80%:

- A picture is set to fill the background:

- The table fill color is set to solid color Blue, Accent 1, Lighter 80%:
Using the Format pane
Right-click the selection and choose Format Shape... in the popup menu:
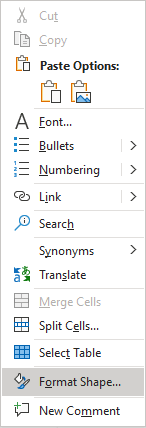
On the Format Shape pane, on the Shape Options tab, in the Fill & Line group, in the Fill section, choose the one you need:
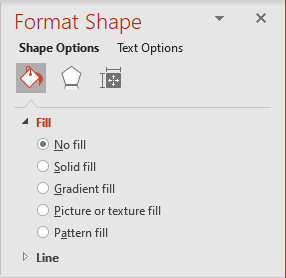
- The No fill option makes the selected cell or cells transparent. Thus, the Table Background formatting will be visible, or the slide background will be visible.
The No fill option also is used to clear the selected cell or cells fill formatting.
- The Solid fill option allows choosing the Color and its Transparency:
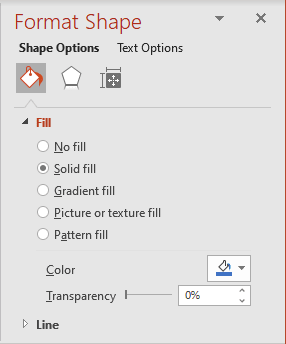
- Click the Color button to choose the color you prefer to fill the selected cell or cells. A solid color is a good choice for readability.
- Move the Transparency slider to adjust the color transparency, or set a specific transparency percentage:

Note: By default, fill colors are opaque (other background formatting does not show through). A transparency setting of 100% makes the fill color invisible, while the default value for an opaque color is 0%.
- The Gradient fill option is used to add an accent to an object.
See how to work with gradients for more details.
- The Picture or texture fill allows one of the following:
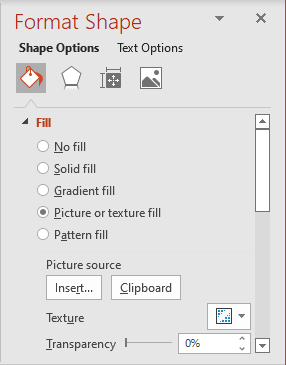
- Insert a picture from any graphic file from different sources by clicking the Insert... button.
- Insert any graphic object such as a picture, SmartArt, chart, diagram, etc., from the Clipboard.
- Choose any of the predefined textures from the Texture dropdown list. It is the same Texture list as in the ribbon tab:

You can select from various textures, including fabric, marble, granite, wood grain, and Formica-like textures in various colors. See how to use a texture fill.
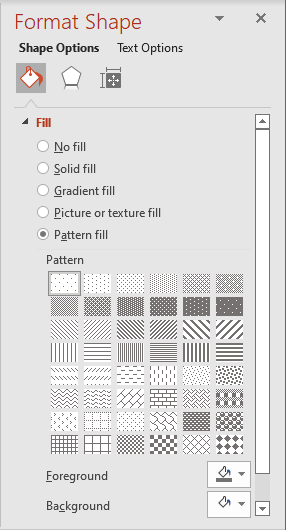
- The Pattern fill option allows using one of 48 simple patterns with different Background and Foreground colors:
Format linked or embedded tables
You can't format linked or embedded table data in the same way that you can format a PowerPoint table on a slide:
- An embedded table opens in an Excel window on the slide,
- A linked table opens in a separate Excel window.
The correct way is to modify the source document, not the linked object on the slide, as any content or formatting changes the linked object on the slide. Any content or formatting changes you make to the linked object will be overwritten the next time you open the presentation because PowerPoint will update the linked object to reflect the information in the source document.
Clear background colors and shading
To clear a cell fill color, select the cell or cells you want to clear, then do one of the following:
- On the Table Design tab, in the Table Styles group, on the Shading menu, click No Fill.
- On the Format Shape pane, on the Shape Options tab, in the Fill & Line group, in the Fill section, choose No fill.
To clear the table fill color, click inside the table to activate it, then on the Table Design tab, in the Table Styles group, click the Shading button to open the dropdown list, then from the Table Background list, choose No Fill:

