Calendar project planning in PowerPoint
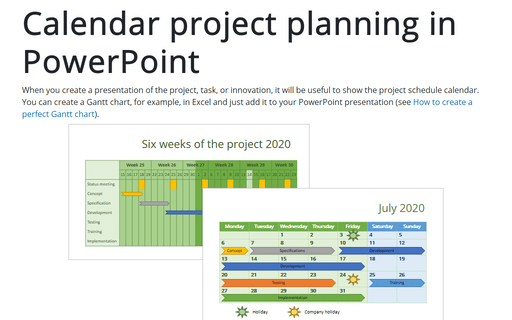
But, for many cases, a proper Gantt chart is too complicated and it is unnecessary to spend the time on details. Instead, you can create a simple calendar view for an overview of the proposed calendar plan:


To create a calendar plan, do the following:
I. Create a background calendar:
To create a simple calendar, analyze the period that you would like to show and add the appropriate table to your slide:
- To show a month view – see How to create a calendar for one month.
- To show a six-weeks view – see How to create a multi-week calendar.
II. Create tasks for the project:
1. On the Insert tab, in the Illustrations group, choose the Shapes dropdown list:

2. In the Shapes list, select the shape that you want to use for the task. It can be:
- the simple rectangle:
- any kind of arrows:

In this example, Arrow: Chevron was chosen:

3. From the Shapes dropdown list, you can choose any other shape for events. For example, the sun shape to show holidays:

4. Add as many shapes to the slide as you need.
5. Change the format for every shape like you prefer:
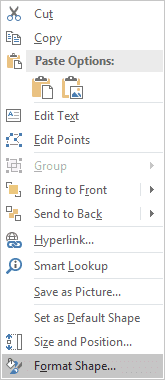
5.1. Right-click on the selected shape (or several selected shapes) you want to change and select the Format Shape... in the popup menu.
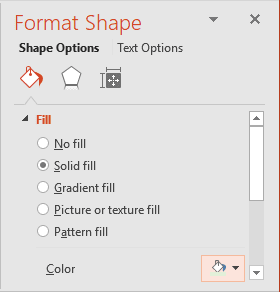
5.2. On the Format Shape pane, on the Shape Options tab, in the Fill & Line group:
- In the Fill section, choose the color you like:
- In the Line section, choose the color for the shape's borders.
6. To add the text to the shape, just double-click in it and enter the text.
Note: For some small or specific shapes, when you try to add the text, it can't be shown correctly because of margins or orientation:

To change margins or orientation for the text in shape, do the following:
1. Right-click on the shape (or several selected shapes) and choose Format Shape... in the popup menu:
2. On the Format Shape pane, on the Text Options tab, in the Textbox group, in the Text Box section, change margins (for example to 0):
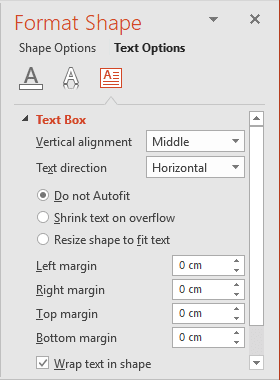
For some situations, it is necessary to change the Text direction or uncheck the Wrap text in shape checkbox:

Now, you have the calendar plan that you can show to your colleagues or partners.
See also this tip in French: Calendrier de planification du projet dans PowerPoint.
