Messages with expiration date and time

If you need to receive some kind of response or data from the recipient before a certain time, use flags or follow upps.
When a message has an expiration date set, you can:
- Use conditional formatting to configure Outlook to highlight messages with an expiration date and time from other messages.
- Use AutoArchive to delete a message automatically after this date.
Set an expiration date and time for the message
If you are sending an offer with a limited validity period, in addition to specifying the validity period of the offer in the message body, you can also specify the date in the message properties. To set up the expiration date for the email message in Outlook (a new message, reply, or forward), open the Properties dialog box by doing one of the following:
- If you use the Simplified ribbon (see more about customizing ribbons), on the Options tab, click the dialog box launch button in the lower right corner of the Tracking group of the Options tab:

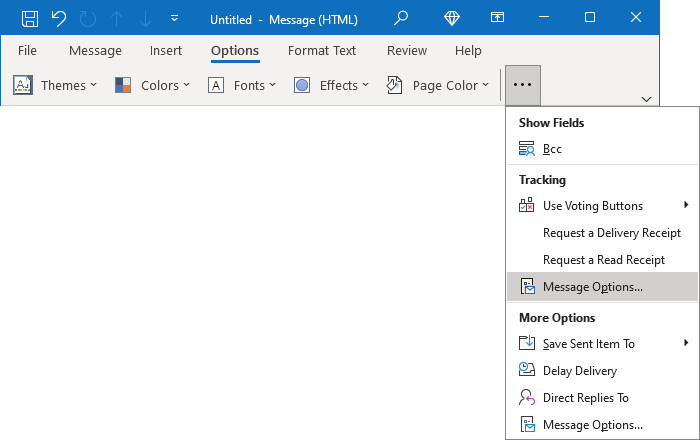
Note: If you don't see it on the ribbon, click the More commands button - three points to the very right of the ribbon buttons, then choose Message Options...:
- If you use the Classic ribbon, click the dialog box launch button in the lower right corner of the Tags group of the Message tab or the Tracking or More Options groups of the Options tab:
 or
or
 or
or

- On the File tab, click the Properties button:
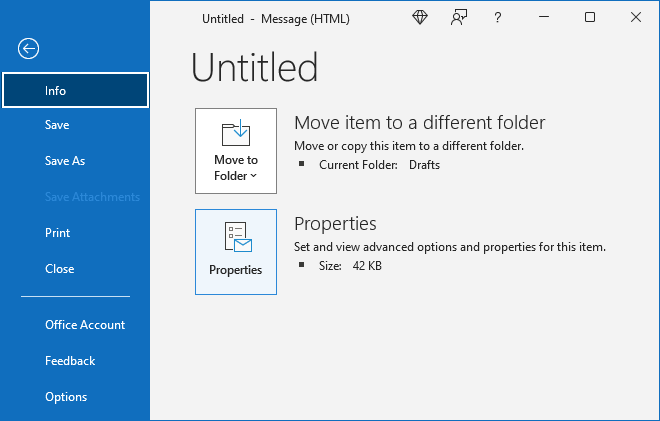
In the Properties dialog box:
- Select the Expires after checkbox,
- Specify the date and time from the appropriate drop-down lists that you want the message to expire

After sending the message, Outlook doesn't show any information in the Reading pane or the message window.
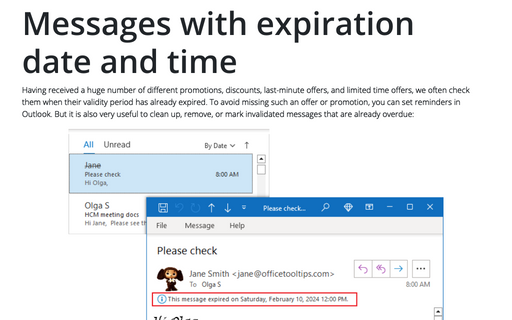
When the specified date and time is realized, expired messages for both the recipient and the sender:
- In the Reading pane, remain visible in the message list with a strikethrough.
The message can still be opened, but the strikethrough visually indicates that the message is outdated or no longer relevant.
- In the message window, display the information message "This message expired on {date, time}":

Set an expiration date for all outgoing messages
You can customize Outlook to automatically add an expiration date of some number of days after the message is sent to all outgoing messages. To do so, follow the next steps:
1. On the File tab, click Options:

2. In the Outlook Options dialog box, open the Mail tab.
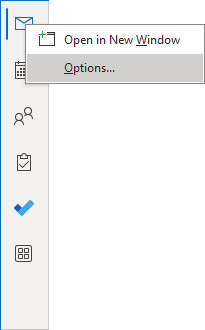
Note: You can easily open the Mail tab in the Outlook Options dialog box by right-clicking the Mail icon in the Navigation bar and choosing Options... in the popup menu:
 or
or
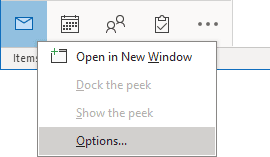
See more about customizing the Navigation bar in Outlook.
3. In the Outlook Options dialog box, on the Mail tab, under Send messages:
- Select the Mark messages as expired after this many days checkbox,
- Type or set the days you wish for the email to expire (between 1 and 9999 days):

- Click OK to close the Outlook Options dialog box and save changes.
Set an expiration date and time for the received message
For some purpose, you may need to set or change the expiration date and time for the received message. To do so, open the Properties dialog box by doing one of the following:
- If you use the Simplified ribbon (see more about customizing ribbons), click the dialog box launch button in the lower right corner of the Tags group of the Message tab:

- If you use the Classic ribbon, on the Message tab, in the Tags group, click the dialog box launch button in the lower right corner:

- On the File tab, click the Properties button:
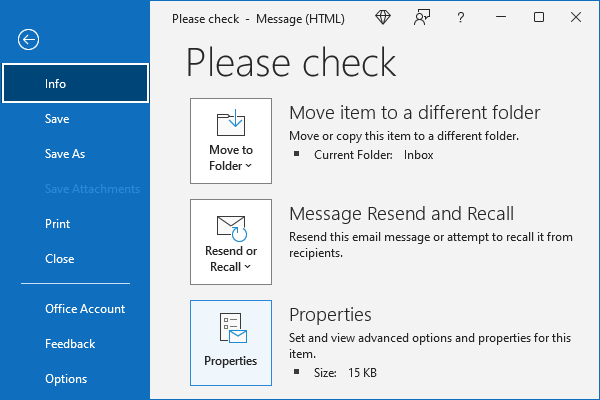
In the Properties dialog box:
- Under Delivery options:
- Select the Expires after checkbox,
- Specify the date and time from the appropriate drop-down lists that you want the message to expire:

- Click the Close button to save changes.
Use the Condition formatting to display all messages that have an expiration date
To display all the messages that have an expiration date before they actually expire, do the following:
1. Open the Conditional Formatting dialog (see more about Condition Formatting in Outlook) by doing one of the following:
- If you use the Simplified ribbon (see more about customizing ribbons), on the View tab, click the Current View button, then choose View Settings...:
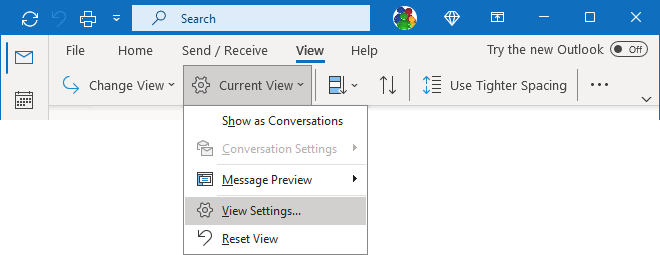
- If you use the Classic ribbon, on the View tab, in the Current View group, click the View Settings button:

In the Advanced View Settings dialog box, click the Conditional Formatting... button:
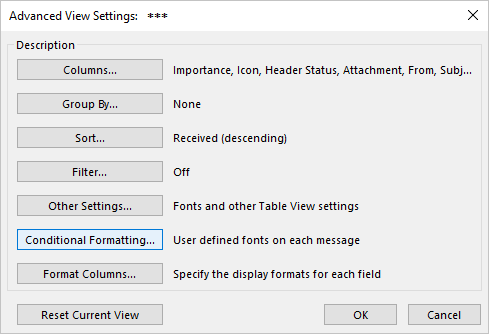
2. In the Conditional Formatting dialog box:
- Click the Add button to add a new conditional formatting rule:

- Under Properties of selected rule, in the Name field, type the name of the new rule. For example: Set to expire.
- Click the Font... button to specify the font highlighting options of your choice:

In the Font dialog box, set the highlighting options, then click OK. For example:

- Click the Condition... button to set rules for the messages with the entire date:

In the Filter dialog box, on the Advanced tab, choose the following condition:
- From the Field dropdown list, choose Expires (choose the Date/Time fields -> Expires, All Mail fields -> Expires, or All Post fields -> Expires), or type the field name in the appropriate textbox:

- From the Condition dropdown list, choose Anytime (you can specify the period instead, e.g., in the next 7 days):

Click the OK button to close the Filter dialog box.
- From the Field dropdown list, choose Expires (choose the Date/Time fields -> Expires, All Mail fields -> Expires, or All Post fields -> Expires), or type the field name in the appropriate textbox:
- Click the OK button to close the Condition Formatting dialog box.
Outlook displays the email messages regarding the specified conditional formatting:

Automatically delete expired items using AutoArchive
To avoid storing expired (and therefore no longer needed) messages in Outlook, archive email messages manually or use the AutoArchive feature in Outlook, which automatically moves older items to the archive. To customize Outlook to automatically delete all the expired messages, follow the next steps:
1. On the File tab, click Options:

2. In the Outlook Options dialog box, open the Advanced tab.
Note: You can easily open the Advanced tab in the Outlook Options dialog box by right-clicking the More Apps icon in the Navigation bar and choosing Options in the popup menu:
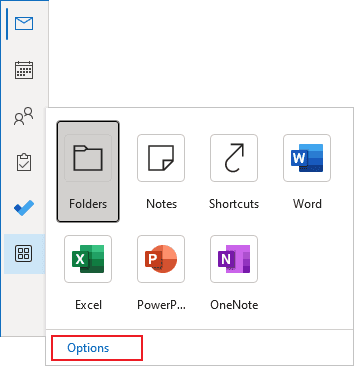
See more about customizing the Navigation bar in Outlook.
3. In the Outlook Options dialog box, on the Advanced tab, under AutoArchive, click the AutoArchive Settings... button:

4. In the AutoArchive dialog box:
- Select the Run AutoArchive every {X} days checkbox:

- Set the number of days to the number you prefer.
Note: You can set it to 1 day to delete all expired messages on that exact date. Otherwise, it will be deleted between 1 and X days after the message expired.
- Ensure that the Delete expired items (email folders only) checkbox is selected.
5. Click the OK button twice to close dialog boxes.
The next time AutoArchive runs after the expiration date, it will automatically delete the expired elements. See more about AutoArchive feature for all Outlook folders or for the folder.
