Message settings
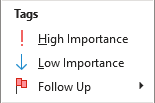
- In the Tags group on the Message tab:
 or
or
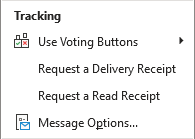
- In the Tracking and More Options groups on the Options tab:
 or
or
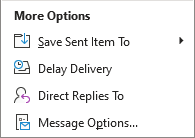
 and
and
 or
or
The most complete set of parameters that can be used, except tracking flags, is presented in the Properties dialog box:

The Properties dialog box can be opened:
- by clicking the dialog box launch button in the lower right corner of any of the Tags, Tracking, and More Options groups:
 or
or
 or
or

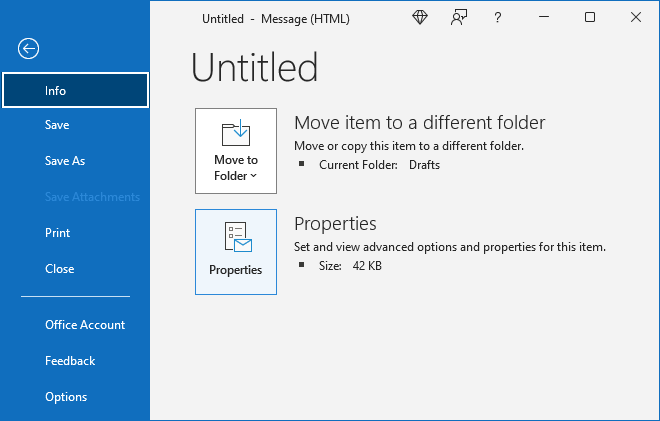
- by clicking the File tab, then clicking the Properties button:
Message importance (priority)
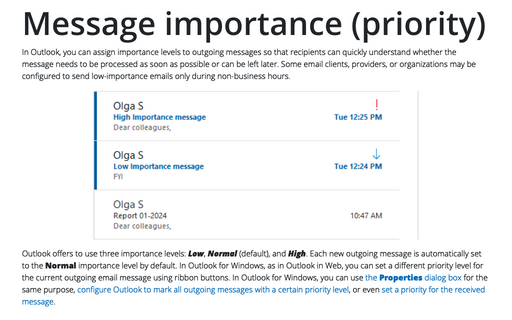
Outgoing messages can be assigned importance levels so that recipients can quickly understand whether the message's contents need to be processed as soon as possible or postponed for a later time. Some email clients of providers or organizations may be configured so that low-importance emails are sent only outside business hours.
You can use one of three importance levels: Low, Normal (default), and High. Each new outgoing message will automatically be set to the Normal importance level:

- The Low priority messages are marked with a blue down-pointing arrow (
 ) and have the "This message was sent with Low importance" information above the message body:

- the High priority is displayed as a red exclamation point (!) and has the "This message was sent with High importance" information above the message body:

Note: See more about working with message importance (priority).
Message sensitivity
You can specify whether the message should be treated as regular, private, or confidential by setting Normal (default), Personal, Private, or Confidential sensitivity levels. By applying a sensitivity level to a message, you can ensure that all recipients of your message understand how sensitive the content of your message is and will act accordingly. Sensitive settings only notify people receiving the message that they may want to treat the message differently than a regular message. Some organizations have special rules for handling confidential messages that do not even allow messages with some sensitivity level to be sent outside.
By default, each outgoing message is automatically assigned a Normal sensitivity level (see how to customize the Sensitivity level for all outgoing messages in Outlook for Windows). To assign another level of sensitivity:
- You can't find special buttons on the ribbon by default (see how to customize the ribbon for more details),
- In the Properties dialog box, in the Settings section, click the Sensitivity drop-down arrow and choose one of the following options:
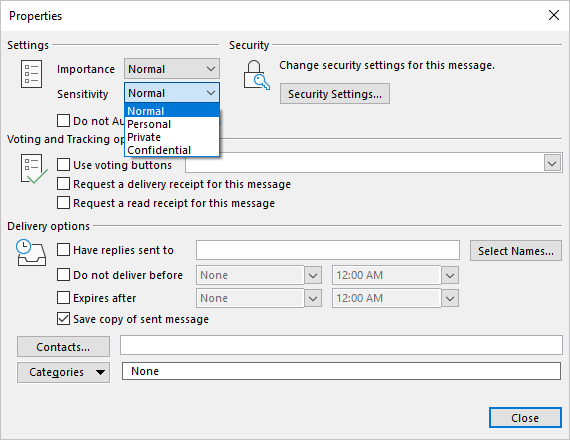
- The Normal option indicates that the message contents are standard or customary.
- The Personal option suggests that the message contains personal and, thus, sensitive information. The information "Please treat this as Personal" is placed at the top of the message:

- Private - Use this option to prevent the message from being edited (text changes, copy, paste, and so on) after you send it. The information "Please treat this as Private" is placed at the top of the message:

- The Confidential option indicates that the message contents are restricted or private. The recipient can edit confidential messages. Marking the message Confidential only suggests how the recipient should handle the message's contents. The information "Please treat this as Confidential" is placed at the top of the message :

Note: When replying or forwarding to email messages with a specified sensitivity level, this level is maintained for the reply or forward email message.
Security settings
To set security settings to a single message, in the Properties dialog box, under Security, click the Security Settings... button:

In the Security Properties dialog box:
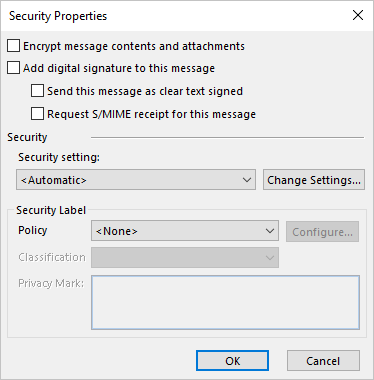
- Select the Encrypt message contents and attachments checkbox to apply the Digital ID, then click OK.
Note: If you do not have a digital ID enabled, an error message will be displayed.
- Select the Add digital signature to this message checkbox to apply the digital signature, then click OK.
You can also:
- Select the Send this message as clear text signed checkbox if the recipients do not use an email client that supports S/MIME security.
- Select the Request S/MIME receipt for this message checkbox - this feature requires the recipient to use an email client that supports the S/MIME security standard.
The options convert the message from readable plain text to encrypted text. Only the recipient who has the private key that matches the public key used to encrypt the message can see a readable text. However, any recipient without a private key sees illegible text.
Add the voting buttons
To poll all recipients and ask questions with a limited set of answers, it is very useful to use Voting buttons. Recipients can use Voting buttons to reply to your email, and your results will be automatically calculated for you.
In the Properties dialog box, under Voting and Tracking options, the Use voting buttons drop-down list allows adding custom voting buttons (see how to add and use voting button in Outlook for more details):

Request delivery and read receipts
To be sure that someone has received your message, you can request:
- A delivery receipt:
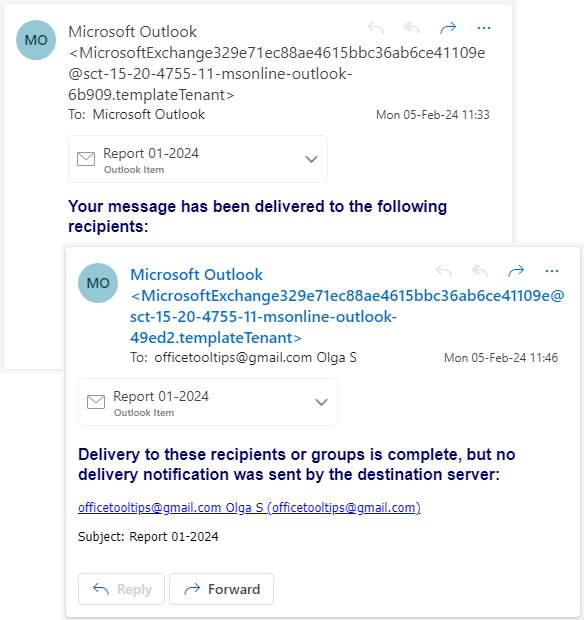
- A read receipt:
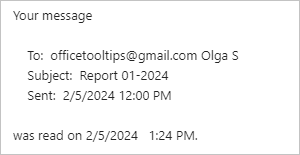
In the Properties dialog box, under Voting and Tracking options, use the Request a delivery receipt for this message and Request a read receipt for this message options to request notifications that your message has been received and read (see how to request Delivery or Read Receipt for a message for more details).
Redirect replies
In Outlook, you can configure the ability to forward replies sent in response to your message to another email address. For example, if you want to collect some data from your employees, send a message from your account, but using this feature, redirect all responses to the account of the responsible person.
The recipient won't know that you have chosen to redirect replies to another address until they click the Reply button and see a different email address shown in the To field:

To customize the redirect replies, in the Properties dialog box, in the Delivery options section, check the Have replies sent to option if you want replies to this message to be sent to a different address than the one from which this message is sent. See more about re-directing replies.
Send a message later
Microsoft Outlook supports scheduling email messages to be sent later and time instead of sending them immediately. You can set up different delivery schemes: set up sending only manually, set sending time for all or a specific message, etc. See how to set up different message sending schemes in Outlook.
To customize the message delivery scheduling, in the Properties dialog box, in the Delivery options section, check the Do not deliver before option and select the date and time when this message should be sent (see how to send an E-mail later for more details):

Set an expiration date
A message expiration date can be useful if you need a response before a certain point in time. Strictly speaking, this is a soft indication that this information (survey, data, etc.) is relevant only until the specified time:

To set up the message expiration date, in the Properties dialog box, under Delivery options, check the Expires after option and select the date and time after which recipients will not waste time responding (see more about messages with expiration date and time):

Customize the Sensitivity level for all outgoing messages in Outlook for Windows
To mark all outgoing messages with preferred Sensitivity, follow these steps:
1. On the File tab, click Options:

2. In the Outlook Options dialog box, open the Mail tab.
Note: You can easily open the Mail tab in the Outlook Options dialog box by right-clicking the Mail icon in the Navigation bar and choosing Options... in the popup menu:
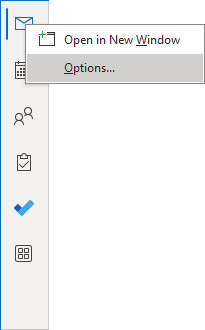 or
or
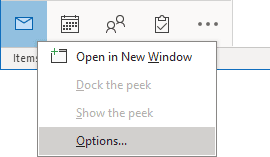
See more about customizing the Navigation bar in Outlook.
3. In the Outlook Options dialog box, on the Mail tab, under Send messages, select the needed value from the Default Sensitivity level dropdown list:
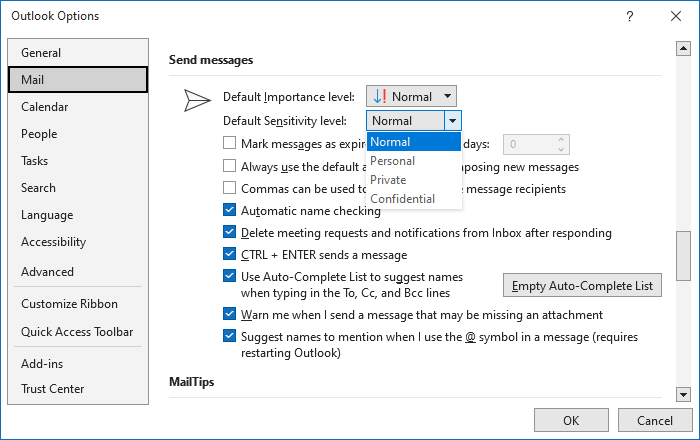
See also this tip in French: Paramètres de message.

