How to add and remove horizontal lines between sections of the document
Enter three or more special characters on a new line and then press Enter, Word automatically expands these characters to a line. A style of this line depends on the characters:

- Three or more "*" - dotted line
- Three or more "=" - double line
- Three or more "~" - wavy line
- Three or more "#" - thick decorative line
- Three or more "-" or "_" - thick single line
These lines often used in Word documents, but you can simply remove them if you understand: this is not a line - this is a paragraph border (for more details see How to use paragraph borders and shading).
And you can turn on/off AutoReplace of these symbols to lines. Do one of the following:
- Then Word makes an AutoReplace, it shows the AutoCorrect Options button. You can click
in it and choose Stop Automatically Creating Border Lines:

- Do the following:
1. On the File tab, click the Options button:

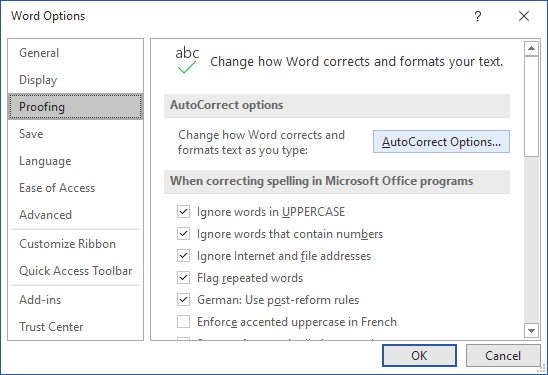
2. In the Word Options dialog box, on the Proofing tab, under AutoCorrect options, click the AutoCorrect Options... button:

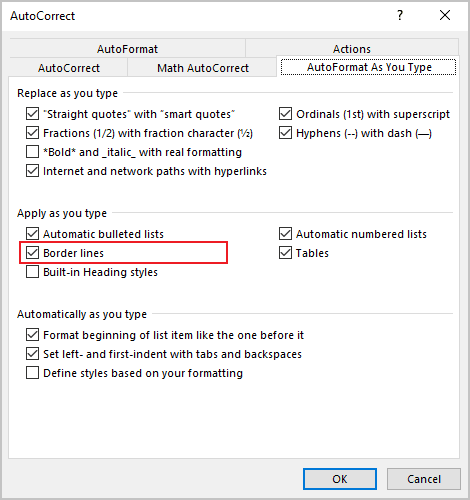
3. In the AutoCorrect dialog box, on the AutoFormat As You Type tab, in the Apply as you type group, check or uncheck Border lines to turn on or off this option:

See also this tip in French: Comment ajouter et supprimer des lignes horizontales entre des sections du document.

