Create Table of Contents for non-predefined headings and Table entry fields
Along with many other functions, Word offers the ability to customize which headings or parts of the text to include in the Table of Contents and what order:

To customize which styles and in which order should be inserted in the Table of Contents, do the following:
1. Open the Table of Contents dialog box (see how to create a Table of Contents). E.g., the Table of Contents in the Simple format:

2. In the Table of Contents dialog box, on the Table of Contents tab, click the Options... button:

3. In the Table of Contents Options dialog box:

- In the TOC level fields, enter the sequence of the levels you want to appear (the checkmarks near the styles' names are checked automatically). See an example of including a custom style in the Table of Contents below.
Note: The Available styles list contains all styles already used in the Word document, including custom styles.
- Select the Outline levels check box (selected by default) to include any paragraph that assigned an outline level (no matter what style it is) in the Table of Contents at that level.
This check box is selectable only for Headings. To any custom style, it is greyed.
- Select the Table entry fields check box to include Table entries to the Table of Contents (see how to create and use the Table of Contents Entries).
The Table entry fields can be used with or without the Headings and other styles.
See an example of including the non-heading text in the middle of the paragraph or even non-existing text in the Table of Contents.
Note: After selecting the Table entry fields check box, specify the identifier in the Table of Contents field!
4. Click the OK button to close the Table of Contents Options dialog box.
5. Click the OK button to the Table of Contents dialog box.
Word asks about updating the existing Table of Contents:

Include a custom style in the Table of Contents
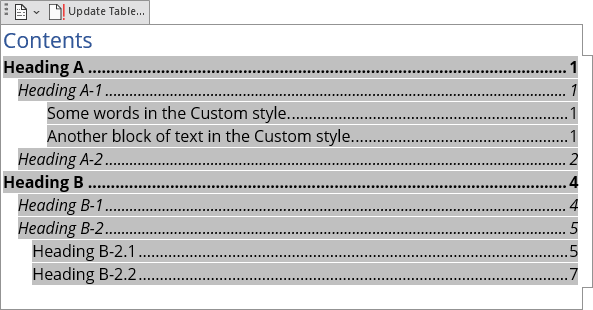
For example, to include the text in the Custom style:

Note: The custom or any selected style should start the paragraph. Otherwise, Word can't recognize the text in the selected style. See how to include parts of text in the Table of Contents.
In the Table of Contents Options dialog box, type the level number for it:

Note: To include more than 3 levels, ensure that in the Table of Contents dialog box, in the Show levels fields is selected the appropriate value (for this example, 4). You can't change that value after selecting the custom style; you can use the field switches instead.
After updating, the Table of Contents includes the blocks of texts in the Custom style:


