How to create a hand-drawn oval shape in PowerPoint
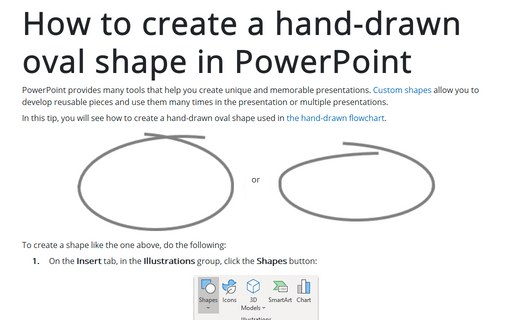
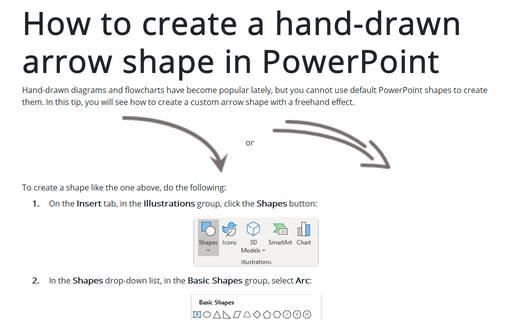
In this tip, you will see how to create a hand-drawn oval shape that is used in the hand-drawn flowchart.
 or
or

To create a shape like the one above, do the following:
1. On the Insert tab, in the Illustrations group, click the Shapes button:

2. In the Shapes drop-down list, in the Basic Shapes group, select Arc:
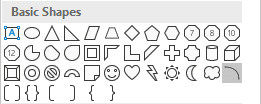
3. Place the first part of the new shape and create its bottom half by moving the orange points:

4. Insert the second part of the new shape:
4.1. On the Insert tab, in the Illustrations group, click the Shapes drop-down list, and then in the Basic Shapes group, select Arc.
4.2. Increase the size of the new Arc shape and place it to create a second part of the new shape:
 or
or

4.3. Change the second part by moving the orange point as you want. For example:
 or
or

5. Insert the third part like the second. For example:
 or
or

6. Select three parts of one shape and group them by doing one of the following:
- On the Home tab, in the Drawing group, select the Arrange drop-down list:

Then click the Group command:
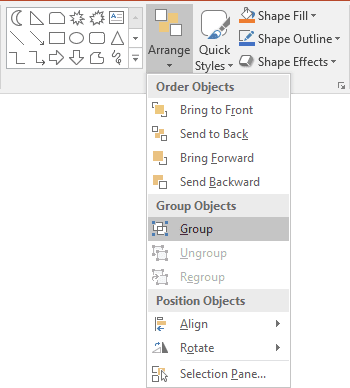
- Under Drawing Tools, on the Format tab, in the Arrange group, click
the Group command:

- Right-click one of the objects and choose Group -> Group from the popup menu:

PowerPoint puts a single box around the objects instead of a separate box around each object:

7. Right-click on the new shape and choose Format Shape... from the popup menu.
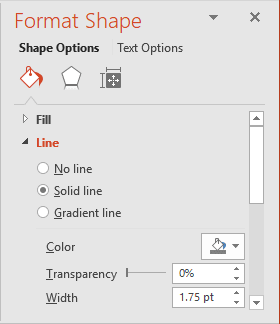
8. In the Format Shape pane, on the Shape Options tab, in the Fill & Line group, in the Line section choose Solid line and then:
- Select Color as you prefer,
- Select Width as you prefer:
Add any other adjustments you like.
