Add the email account in Outlook for Windows 365
The first time you start the Outlook application or the new empty profile, the application will ask you to add an existing email address. Moreover, you may need to add, change, or delete an email account anytime.
See below how to:
- Add an email account with automatic configuration
- Manually add an email account using POP3
- Manually add an email account using IMAP
- Edit or modify email account information
- Edit or update email account settings from Outlook
- Modify email account settings from Mail in the Control Panel
- Delete an email account connection
If you start first time an Outlook application or a profile without any email addresses connected, Outlook automatically displays the first screen for connecting an email account.
If you want to add an email account from Outlook, click the File tab to open the Account Information pane. In the Account Information pane, click the Add Account button:

Note: You can also click the drop-down list with connected email addresses and select Add Account in the bottom of this list:

Outlook automatically starts the Connection Wizard that helps you add an e-mail account to this profile (see more about profiles in Outlook).
Add an email account with automatic configuration
To add an email account with automatic configuration, follow the next steps:
1. In the new connection screen, type or change your email account, and click the Connect button:

2. The following connection screens depend on the email providers. For this example, to connect the Outlook account, on the next screen, enter your password and click the Sign in button:

Notes:
- If something goes wrong, you can close this window and start the connection process from the first step again.
- Data for connected addresses is saved in the Windows registry, so the next time you connect a mailbox that was already connected on the local computer, Outlook may skip the password authorization step - it is already authorized in your local Windows system!
- This step is available if:
- You are adding your first account to the Outlook,
- You entered the correct account and password,
- This account is available.
- Outlook may request additional authentication for the email account that requires extra security. The steps to obtain a password differ for each email provider, such as Gmail. If you are sure that you entered the correct email address and password, but Outlook did not connect to your account, find additional information on connecting your email provider's account to Outlook for Microsoft 365.
Outlook automatically configures all settings and connects to the account.
3. Click OK to see that Outlook configures your local mailbox:

4. After a few minutes (or a little later), you will see the screen with the Account successfully added message:

5. Click the Done button to finish the customization of your account.
Notes:
- Outlook might prompt to reenter the email address and password even if you entered them correctly the first time.
- Outlook may need to restart to apply all necessary customizations to the added account.
Manually add an email account using POP3
Outlook uses POP3 (Post Office Protocol version 3) to download and store messages on the local device (computer or mobile phone). When you connect to an email account using POP3, Outlook downloads messages from your email server to your computer and deletes the original messages from the server after a certain period of time. You read and manage messages on your computer, and Outlook syncs with the server when you connect.
This protocol works best for email accounts that are used on one device but have a huge number of messages. It is also better for poor internet connections and for occasionally working offline.
To add an email account to your local Outlook as POP3, do the following:
1. Ensure you configure the email account on the provider's server, such as Gmail, for the POP3 protocol (see more details on the Internet).
2. In the first connection screen:
- Type or change an email account that you want to add,
- Click the Advanced options link:

- Select the Let me set up my account manually option:

- Click the Connect button.
3. In the next screen, select the POP button:
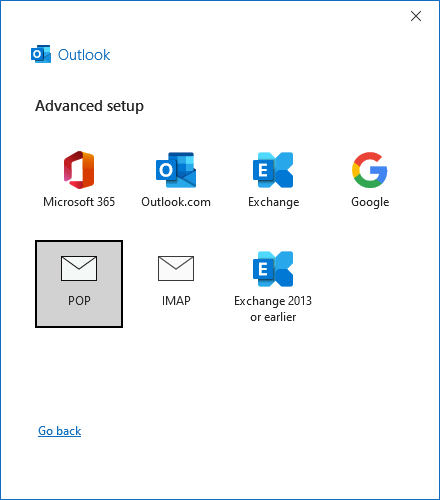
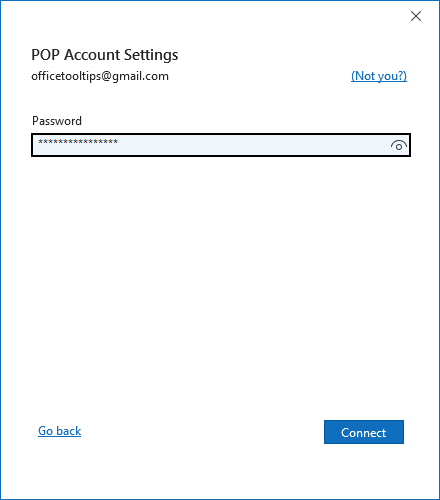
4. After clicking the POP button, Outlook opens a screen with a connection to your email provider. The screen may differ depending on the email service provider.
For example, if you add the Gmail account, type the password, and click the Connect button:
5. After a few minutes, you will see the screen with the Account successfully added message:
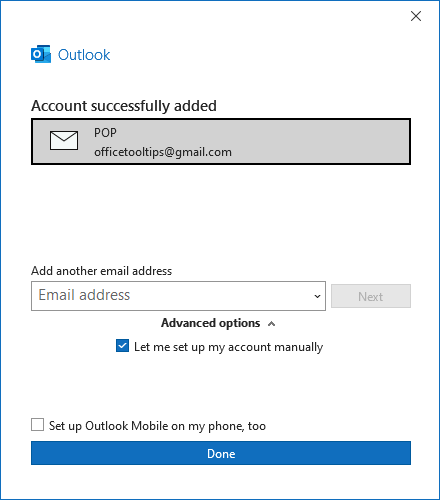
Click the Done button to finish the customization of your account.
Notes:
- There are several situations when you cannot add a new account; the most popular are:
- Your connection data is invalid: check the email address and password,
- The configuration of your email account on the email provider does not match the chosen settings: check the configuration on the email provider's server and the settings you chose. Enable POP3 for your email account if you have selected the POP3 option in Outlook.
- Outlook might prompt to reenter the email address and password even if you entered them correctly the first time.
- Outlook may need to restart to apply all necessary customizations to the added account.
Manually add an email account using IMAP
When you use IMAP (Internet Message Access Protocol), Outlook does not store messages on a local device, such as your computer or laptop. Instead, Outlook stores copies of the messages on your computer, leaving the originals on the email server. You read and manage your messages locally, and Outlook synchronizes with the server when it is connected to the server.
This protocol is better for email accounts you need on multiple devices, such as office computers and smartphones. IMAP is the most appropriate and accessible protocol for the vast majority of Outlook users.
To add an email account to your local Outlook as IMAP, do the following:
1. Ensure you configure the email account on the provider's server, such as Gmail, to work with the IMAP protocol (see more details on the Internet).
2. In the first connection screen:
- Type or change an email account that you want to add,
- Click the Advanced options link:

- Select the Let me set up my account manually option:

- Click the Connect button.
3. In the next screen, select the IMAP button:
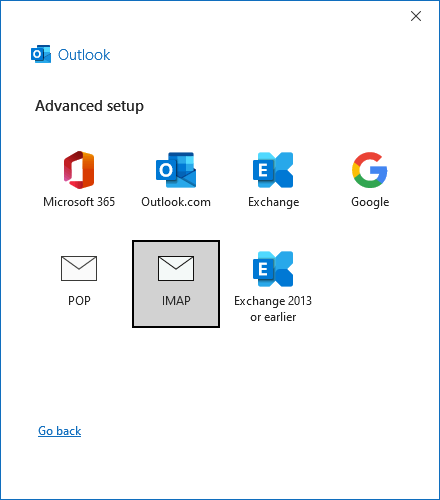
4. After clicking the IMAP button, Outlook opens a screen with connection details for your email provider. The screen may differ depending on the email service provider.
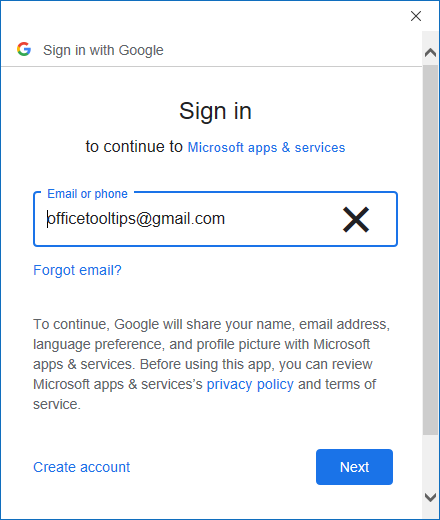
For example, if you add the Gmail account or Yahoo account:
4.1. Confirm your account address and click the Next button:
 or
or
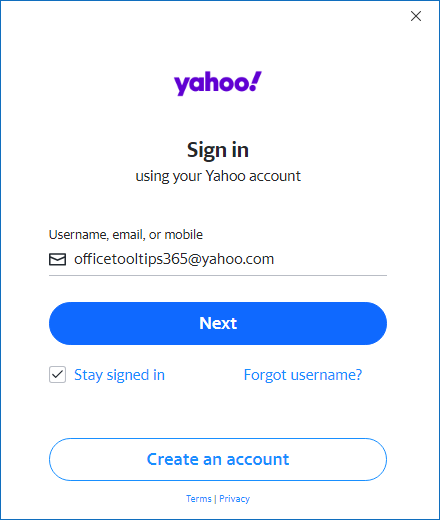
4.2. Type the password and click the Next button:
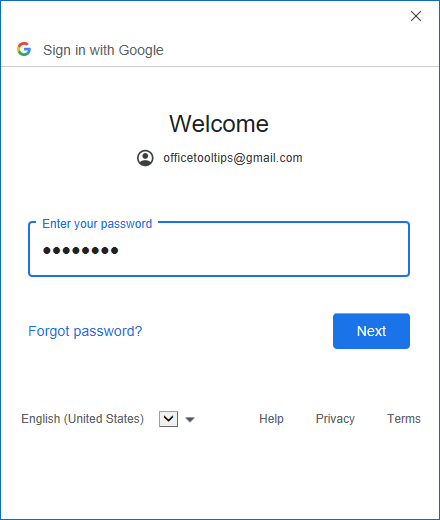 or
or
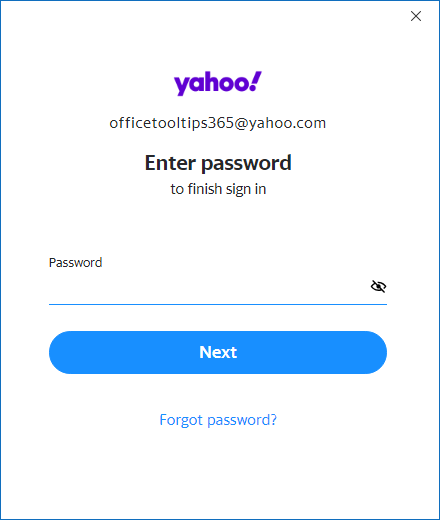
Note: For the account with 2-step verification settings, Outlook opens an additional screen to enter a verification code. Confirm your account if needed.
4.3. If you add a Gmail account, after entering the connection data, Outlook opens a screen to confirm access to your account's information. Scroll down and click the Allow button:
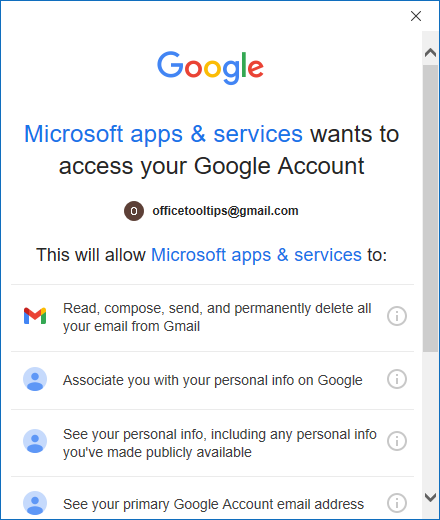
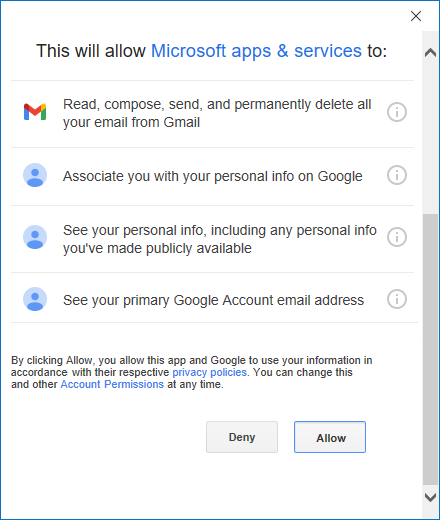
Note: You can click the Deny button to stop adding the Gmail account to Outlook.
4.4. After a few minutes, you will see the screen with the Account successfully added message:
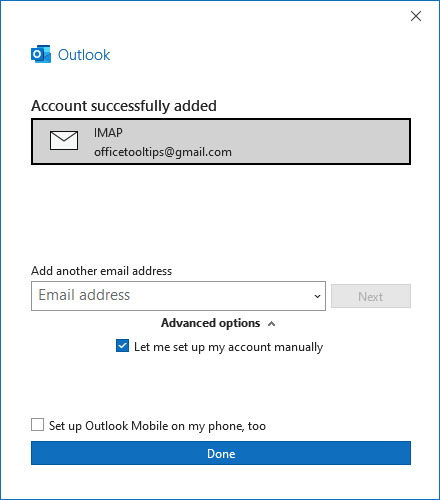
4.5. Click the Done button to finish the customization of your account.
Note: If you need to add an additional account, you can type or select it in the Add another email address field and click the Next button.
Edit or modify email account information
There are some situations in which you might need to make changes to the settings in your e-mail account. For example, if you change your email password, if your provider changes some connection settings, or if you have problems sending or receiving emails. You can edit your e-mail account settings:
- from Mail in the Windows Control Panel if you want to modify or update Incoming server or Outgoing server settings, port numbers, passwords, etc.,
- from Outlook if you want to change some Exchange account settings, POP / IMAP account settings, such as:
- Reply-to address (see more about replying address),
- Customize Outlook to:
- Automatically analyze answers and show tracking information (see more on how to show the voting results),
- Work with deleted items,
- etc.
Edit or update email account settings from Outlook
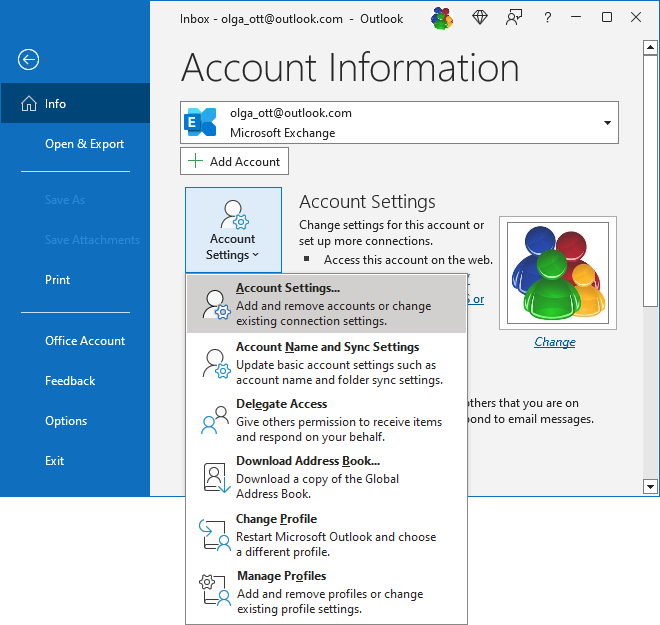
1. Click the File tab in Outlook to open the Account Information pane.
2. In the Account Information pane, click the Account Settings button, then choose Account Setting...:
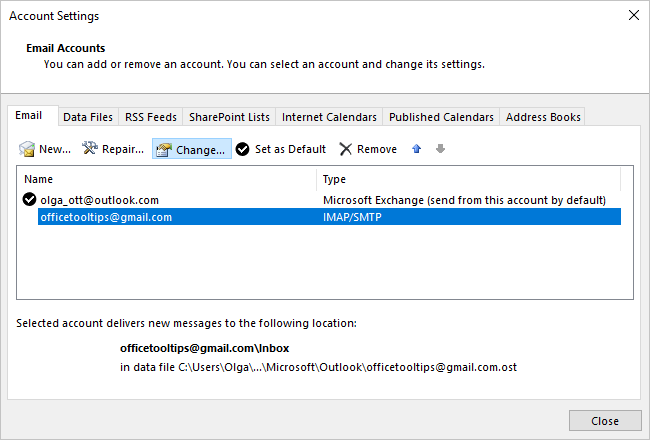
3. In the Outlook Account Settings dialog box, select the email account you want to change, then click the Change... button:
4. In the Exchange / POP / IMAP Account Settings dialog box, make the changes you need, then click the Next button:

Modify email account settings from Mail in the Control Panel
1. Open the Control Panel (see how to open the Control panel in Windows 10).
2. In the Control Panel dialog box, in the Search Control Panel textbox, start to type the first symbols of the word Mail to find the Mail (Microsoft Outlook) item:

Note: The Mail (Microsoft Outlook) icon won't appear unless you have installed Microsoft Outlook and have run the program at least once.
3. In the Mail Setup - Outlook dialog box, click the Email Accounts... button:
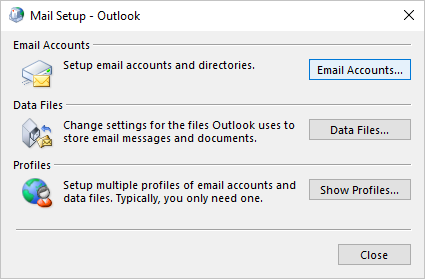
Note: If you use several profiles, you may need to open the necessary profile, then click the Properties... button to open the appropriate accounts set.
4. In the Account Settings dialog box, select the account you want to modify, then click the Change... button:
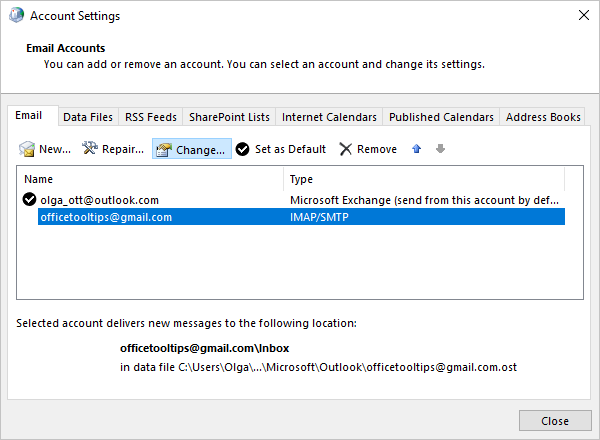
5. In the Change Account dialog box:

- Correct, update, or change the login information,
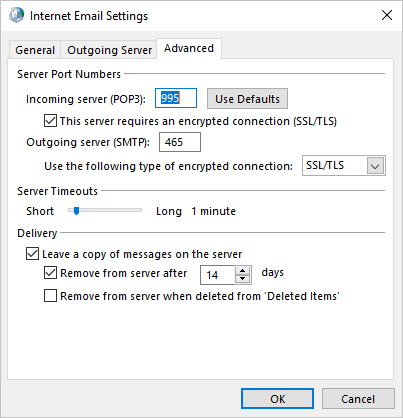
- Click the More Settings... button to open the Internet Email Settings dialog box, where you can modify additional information, such as:
- E-mail address you want to appear when you reply to a message (see reply email address for more details),
- Outgoing server authentication information,
- Incoming server and Outgoing server port numbers.
For example, for the Google POP3 account:
Note: Outlook might prompt to reenter the email address and password even if you entered them correctly.
Delete an email account connection
If you no longer need a connected email account in your current profile (see more about profiles), do one of the following:
- In Outlook, in the Mail view, right-click the email account you want to delete, then click Remove *** (name of the account) from the popup menu:
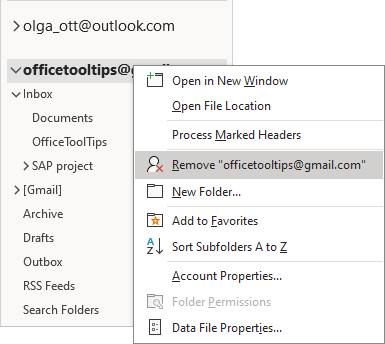
Note: The Remove *** item in the popup menu is available only for non-default email accounts. See how to change the account used by default for more details.
- Click the File tab in Outlook, then in the Account Information pane, click the Account Settings button, then choose Account Setting...:

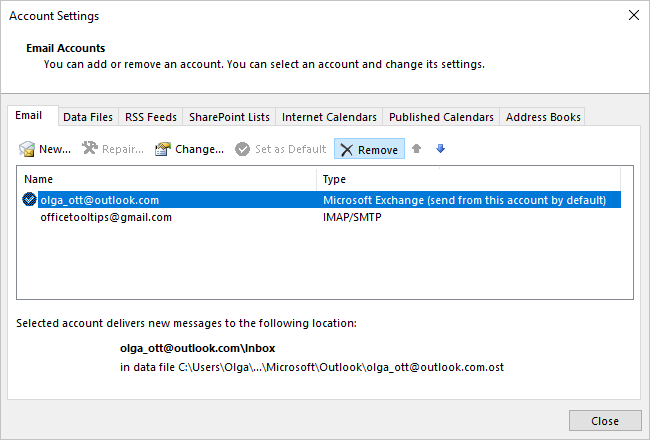
In the Outlook Account Settings dialog box, select the account you want to delete, then click the Remove button:
- Open the Account Settings from Mail in the Windows Control Panel (see steps 1-3 of modifying email account settings from Mail in the Control Panel).
In the Outlook Account Settings dialog box, select the account you want to delete, then click the Remove button:
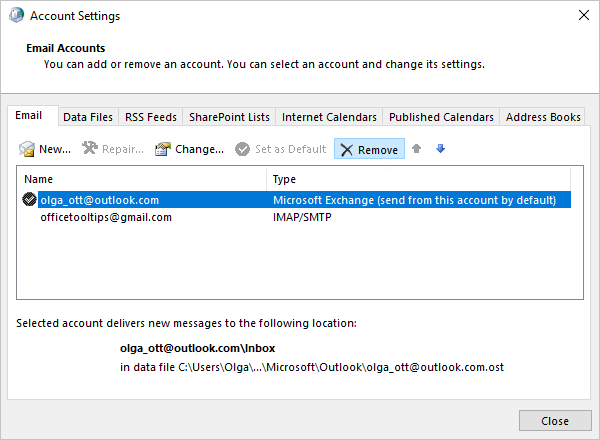
Outlook displays the confirmation message to ensure that you really want to remove the selected email account. To remove it, click the Yes button; to cancel removing, click the No button:

Note: You can remove connected email accounts from the profile - see how to edit or modify the profile.
