Remove entries from the AutoComplete list
Occasionally, people make mistakes while entering addresses by hand or receiving incorrect ones to use.
As a result, you can see two or more addresses for the same person in the AutoComplete list, or you have invalid addresses due to manual migration. In this case, you need to remove some addresses from the AutoComplete list.
You can remove an entry one at a time from the list or clear the AutoComplete list.
Remove entries from the AutoComplete list
To remove addresses that you no longer need or that are incorrect from the AutoCorrect list, do the following::
1. Open a new message and start typing the address you want to delete:

2. In the suggestions from the AutoComplete list, use the down arrow key or the mouse to highlight but not select the address you want to delete.
3. Press the Delete key on your keyboard or click the X button on the right of the address you want to delete:

Notes:
- The entries in the suggested lists are not arranged in alphabetical order; Outlook arranges the entries in descending order of frequency of use. This way, the least frequently used email addresses and names will be at the bottom of the list.
- Once you remove a name from the autocomplete list, it is added back to the list the next time you send an email using that address.
- The AutoComplete list is created on all devices where you use the Outlook application independently. Thus, you have different AutoComplete lists in your Outlook for Windows and Outlook for Web.
- Currently, you can't delete AutoComplete entries on mobile devices.
Clear the AutoComplete list in Outlook for Windows
To clear the AutoComplete list, do the following:
1. On the File tab, click the Options button:

2. In the Outlook Options dialog box, open the Mail tab.
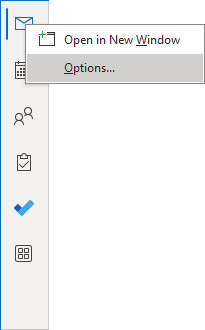
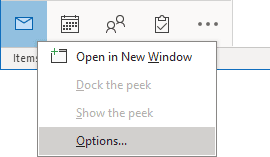
Note: You can easily open the Mail tab in the Outlook Options dialog box by right-clicking the Mail icon in the Navigation bar and choosing Options... in the popup menu:
 or
or

See more about customizing the Navigation bar in Outlook.
3. In the Outlook Options dialog box, on the Mail tab, under Send messages, click the Empty Auto-Complete List button:

After clicking the Empty Auto-Complete List button, Outlook displays the warning message:

Click the Yes button to clear the list, or click the No button to cancel the clearing.
Note: You can use the switch /CleanAutoCompleteCache to start Outlook with an empty AutoComplete list. See more about how to use switches in Outlook for Windows.

