Open and edit files in Protected View
When the file is opened in Protected View, Word, Excel, or PowerPoint displays:
- Protected View label in the title bar to the right of the file name,
- a yellow banner at the top of the content pane explains why the file was opened in Protected View.
For example:


Read-only the file opened in Protected View
If you are not going to change the file content, you can hide the banner by clicking the Close button (the X) at its right end.
Open a file in Protected View
To open a file in the Protected View mode, in the Open dialog box (see how to open this dialog box in Word, in Excel), in the Open list, click the arrow on the right side of the Open button, then select Open in Protected View from the drop-down list.
For example, in Word:

Note: You may face a situation when some types of files, regardless of the location, don't open, and a warning message is displayed. For example:

See File Block settings below to configure which files can be opened and saved or denied opening or saving.
Modify, edit the file opened in Protected View
If you are sure that the file was received/uploaded from a safe location or the trusted sender and want to edit the file content, click the Enable Editing or Edit Anyway button.
Note: Microsoft Word, Excel, and PowerPoint remember files you have edited even in suspicious locations. The next time you open this file, it may open without the Protected View mode warning. See how to stop remembering such files below (in the Trusted Documents).
Open files from a location without a Protected View
To open a file from a specific online storage folder without switching into the Protected view mode, you need to add it (and its subfolders if needed) to the Trusted Locations list. Do the following:
1. On the File tab, click the Options button:

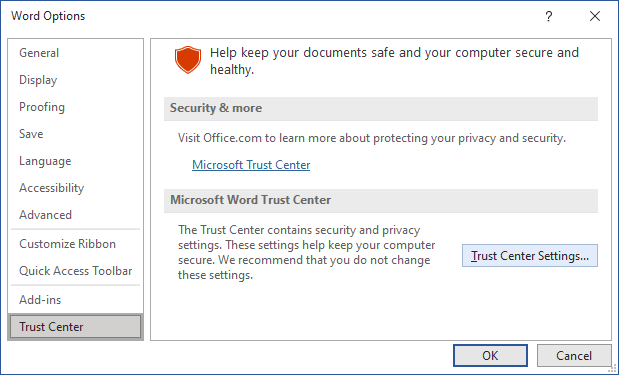
2. In the *** Options dialog box, on the Trust Center tab, click the Trust Center Settings... button.
For example, in Word:
3. In the Trust Center dialog box, on the Trusted Locations tab, the User Locations list shows the folders from which you can open files without Protected View.
For example, in Word:
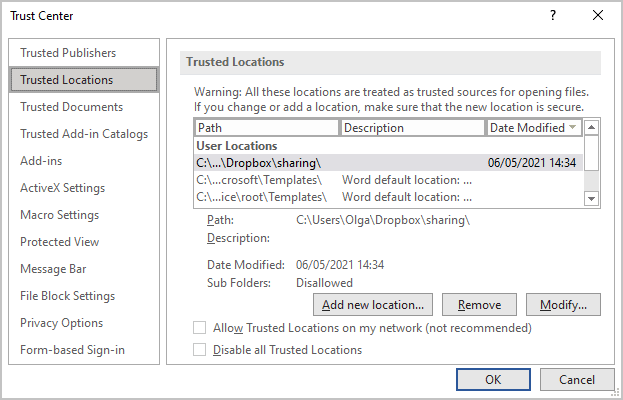
You can add a new location to this list, remove and modify the existing locations.
Change settings to open files without Protected View
In Microsoft Word, PowerPoint, and Excel, there are three core settings selected by default:
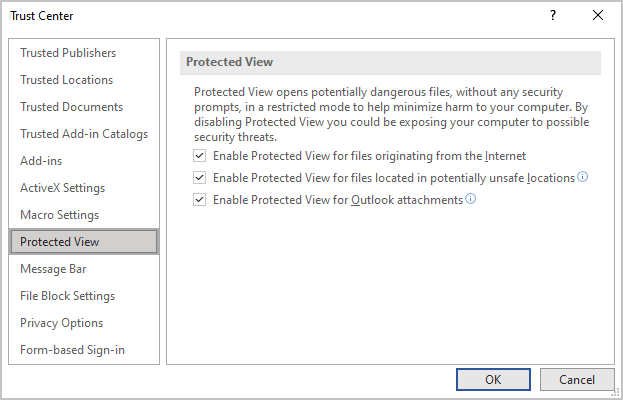
- Enable Protected View for files originating from the Internet controls files opened from a website. To open any file from the Internet without the Protected View mode, unselect this check box.
- Enable Protected View for files located in potentially unsafe locations controls files opened from certain folders considered unsafe, such as Temporary internet files. Unselect this check box if you want to open all files without Protected View.
- Enable Protected View for Outlook attachments controls attachments that you try to open from an email message in Microsoft Outlook. To open any files from the Outlook attachments, unselect this check box.
Excel adds two more settings, both of which are unselected by default:
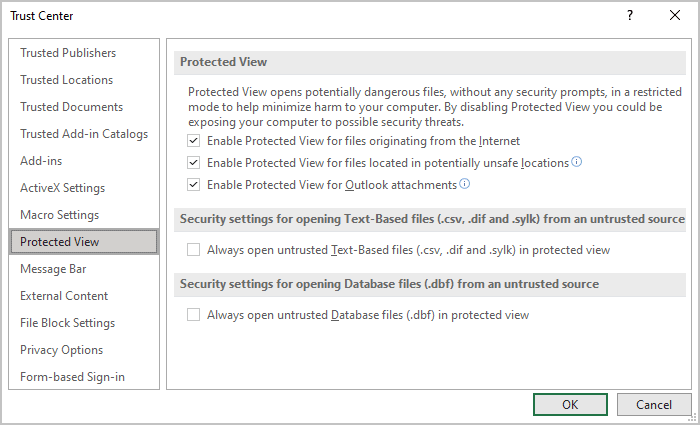
- Always open untrusted Text-Based files (.csv, .dif and .sylk) in Protected View
- Always open untrusted Database files (.dbf) in Protected View
These two additional options control how to open specified files in Excel. If you prefer to open these files in the Protected View mode, select the appropriate check box.
File Block settings
The Block Files list in Word, Excel, and PowerPoint contains file types prohibited from opening or saving in Word, Excel, and PowerPoint, respectively. You can change the list of Block Files by selecting or deselecting the file types that the app opens in Protected View. To make changes, do the following:
1. On the File tab, click the Options button.
2. In the *** Options dialog box, on the Trust Center tab, click the Trust Center Settings... button.
3. In the Trust Center dialog box, on the File Block Settings tab, in the File Type list, select or deselect the Open check box and the Save check box to prohibit the file type from opening and saving.
For example, in Word:
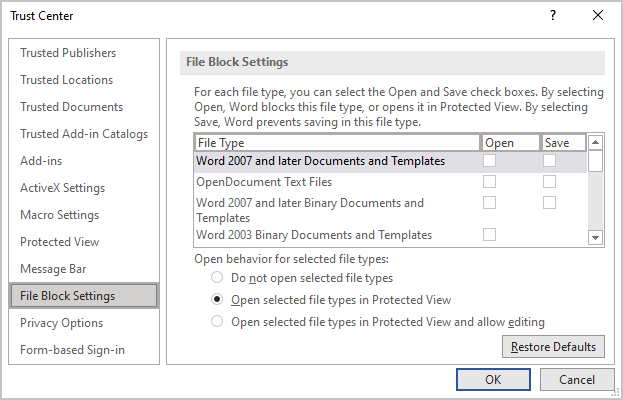
Note: Unfortunately, when writing this tip, options of the Open behavior for selecting file types group work incorrectly. The selected Open check box prohibits from opening the file type even if the Open selected file types in Protected View and allow editing check box is selected. The same problem occurs for the selected Save check box.
Trusted documents
By default, Word, Excel, and PowerPoint remember which files were marked as safe by the user (saved without Protected View). The next time you open such a file, Word, Excel, and PowerPoint will not open it in Protected View, even if the file has been modified.
To stop remembering such files, do the following:
1. On the File tab, click the Options button.
2. In the *** Options dialog box, on the Trust Center tab, click the Trust Center Settings... button.
3. In the Trust Center dialog box, on the Trusted Documents tab, unselect the Allow documents on a network to be trusted check box:
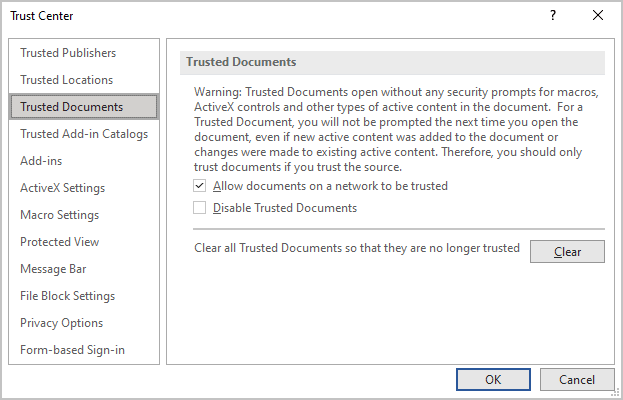
To clear the files already remembered in Word, Excel, or PowerPoint, click the Clear button. In the Microsoft message, click Yes:

