Microsoft Office Themes in Excel
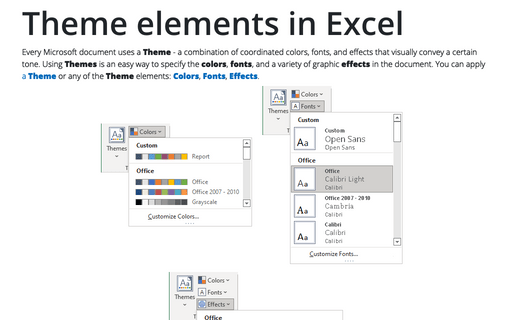
All Microsoft 365 applications share a common set of Themes and Theme elements. Shared styling makes it easy to create coordinated printed and presentation materials. You can also mix and match theme elements, create your custom themes or theme elements for more convenient work, save, share, or use them on any other device.
A Theme in Excel is a set of predefined formatting options that includes theme Colors, Fonts, and Effects.
For example:
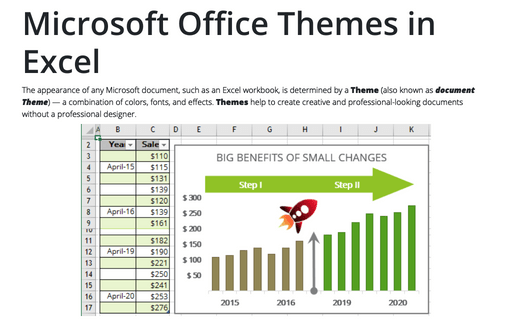
- Spreadsheet elements using the default Office theme:

- The same spreadsheet elements using the Facet theme:

Apply a Theme
To apply the predefined Themes, do the following:
1. On the Page Layout tab, in the Themes group, click the Themes button:

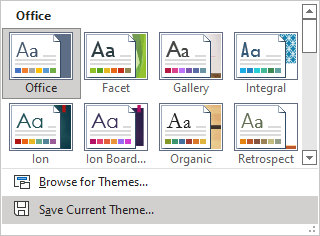
The Themes list displays all predefined themes in the Office section and the custom themes in the Custom section (if available, i.e., if there are custom *.thmx files in the Document Theme folder - see how to create a custom Theme for more details).
2. Point to a Theme and observe the preview on the spreadsheet.
3. Click the chosen Theme to apply it.
Notes:
- Applying a Theme changes the overall design of an entire Excel workbook. You can't specify different themes for different spreadsheets within a workbook.
- To apply a Theme from a nonstandard location (not from the Document Themes folder), in the Themes list, click Browse for Themes...
In the Choose Theme or Themed Document dialog box, browse the theme you want to apply, then click the Open button.
- Themes use different fonts, the size of which may vary. Thus, changing the theme can affect the layout of the spreadsheets.
Some themes can change the page borders if applied and the appearance of charts and tables. Therefore, we strongly recommend checking your documents after applying a new theme.
Create a custom Theme
Along with using a predefined Theme, Excel allows customizing separately three theme elements: Colors, Fonts, and Effects. If you made some changes in any of the theme elements and want to save the customized Theme, do the following:
1. On the Page Layout tab, in the Themes group, click the Themes button, then click Save Current Theme...
2. In the Save Current Theme dialog box:
- In the File Name field, type a name for the new custom theme:
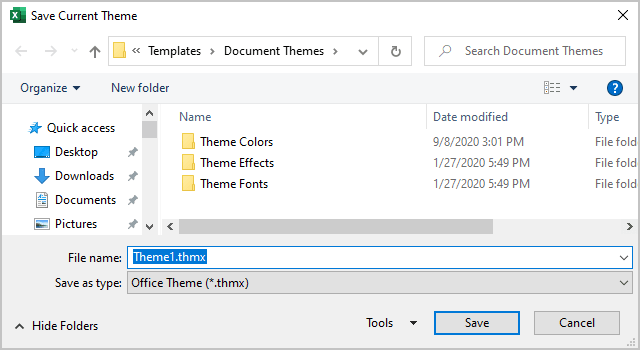
- Click the Save button.
Notes:
- Office Theme (*.thmx) file format allows saving only theme settings (fonts, colors, and effects) without content.
- A custom document Theme is saved in the Document Themes folder and is automatically added to the Custom section of the Themes list.
The location of the Document Themes folder may vary, but it is usually located here:
C:\Users\
<user_name>\ , where <user_name> is your Windows login name.AppData\ Roaming\ Microsoft\ Templates\ Document Themes - Other Microsoft Office applications, such as Word and PowerPoint, also can use these theme files.
Modify a custom Theme
You cannot edit a custom Theme. You can simply modify any Theme elements (it doesn't matter, custom or predefined) and save changes as a new custom Theme by overwriting the existing theme file.
Share a custom Theme
A custom Theme is only available to the current Windows user logged in and only in that location. To share it with other users or locations, do the following:
1. Ensure that the customization is saved – you can see the *.thmx file with the custom name you defined for the custom Theme in the Document Themes folder (see where you can find the Document Themes folder).
2. Copy this *.thmx file to another location you need or send it as an email attachment.
Note:
- If you want to see the custom Theme in the Themes list, copy a *.thmx file to the correspondent Document Themes folder in the new location.
- If you don't want to see this custom Theme in the Themes list, you can copy a *.thmx file to any location except the Document Themes folder (you will need to use the Browse for Themes... option to apply this custom Theme).
Delete a custom Theme
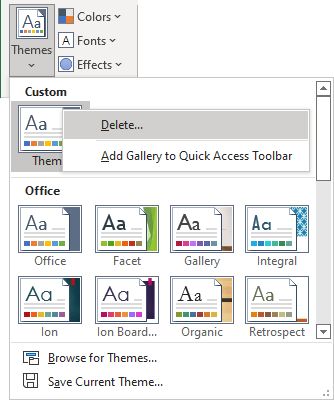
To delete a custom Theme, do one of the following:
- In the Windows Explorer, open the Document Themes folder (see where you can find the Document Themes folder), then delete the *.thmx file with the name you have defined for the custom Theme.
- In the Themes list, right-click the custom Theme, then choose Delete... in the popup menu:
Note: If you don't want to delete a custom Theme but don't want to see it in the Themes list, move the *.thmx file to any folder outside the Document Themes folder (you will need to use the Browse for Themes... option to apply it later).
