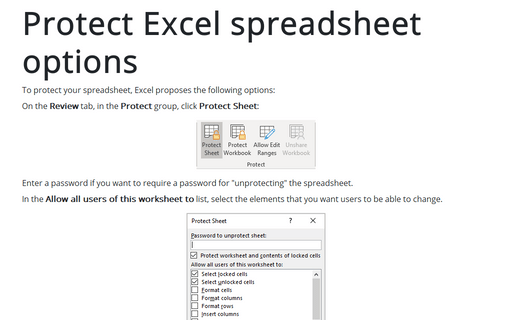
Protecting spreadsheet elements
To protect Excel spreadsheet elements, follow these steps:
1. To unlock any cells or ranges that you want other users to be able to change, see Locking Cells in a Spreadsheet.
2. To hide any formulas that you don't want to be visible, do the following:
2.1. In the spreadsheet, select the cells that contain the formulas that you want to hide.
2.2. Do one of the following:
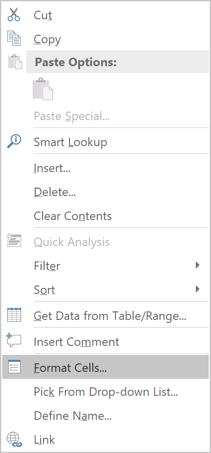
- Right-click on the selection and select Format Cells... on the popup menu:
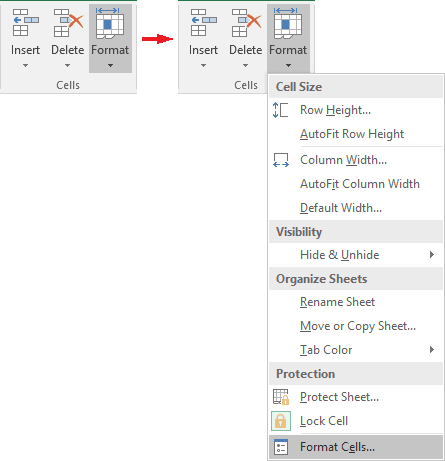
- On the Home tab, in the Cells group, click Format, and then click
Format Cells...:
- Click Ctrl+Shift+F.
2.3. On the Protection tab, select the Hidden checkbox, and then click OK.

3. To unlock any graphic objects (such as pictures, clip art, shapes, or Smart Art graphics) that you want users to be able to change, do the following:
3.1. Hold down CTRL and click each graphic object that you want to unlock.
This adding the Format tab:

You can also use the Go To command to quickly select all of the graphic objects in a spreadsheet. On the Home tab, in the Editing group, click Find & Select, and then click Go To:
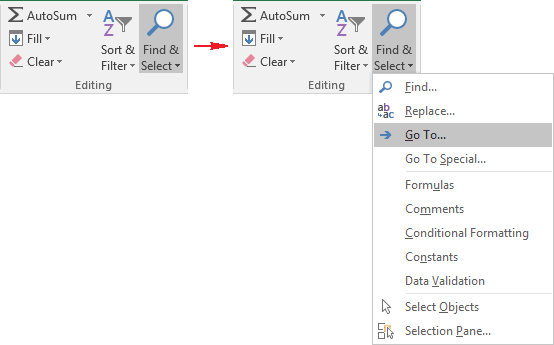
In the Go To dialog box, click Special...:

Then click Objects:

3.2. On the Format tab, in the Size group, click the Dialog Box Launcher next to Size.

3.3. On the Format Picture pane, in the Properties group, clear the Locked checkbox, and if present, clear the Lock text checkbox:

Note: You don't need to unlock buttons or controls for users to be able to click and use them. You can unlock embedded charts, text boxes, and other objects created with the drawing tools that you want users to be able to modify.
4. On the Review tab, in the Changes group, click Protect Sheet.

5. In the Allow all users of this worksheet to list, select the elements that you want users to be able to change (see Protect Excel spreadsheet options).
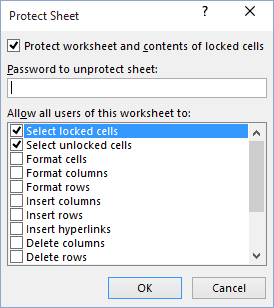
6. In the Password to unprotect sheet box, type a password for the sheet, click OK, and then retype the password to confirm it.
Note: The password is optional. If you don't supply a password, then any user can unprotect the sheet and change the protected elements. Make sure that you choose a password that is easy to remember because if you lose the password, you cannot gain access to the protected elements on the spreadsheet.
See also this tip in French: Comment protéger des éléments de la feuille de calcul.

