Locking cells in a spreadsheet
Locking cells in an Excel spreadsheet is a two-step process. By default, all cells are locked. You must first select and unlock the cells. Then, you must turn on protection on the entire spreadsheet for the "lock" to go into effect.
Follow these steps to unlock cells on a spreadsheet:
1. Select the cells in the spreadsheet that you want to unlock.
2. Do one of the following:
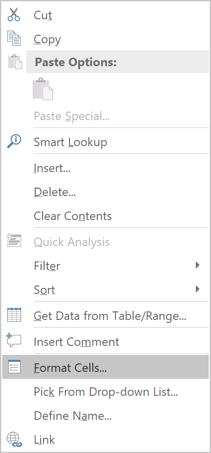
- Right-click on the selection and select Format Cells... on the popup menu:

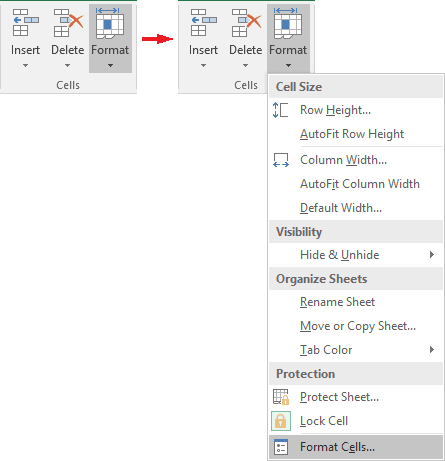
- On the Home tab, in the Cells group, click Format, and then click
Format Cells...:

- Click Ctrl+Shift+F.
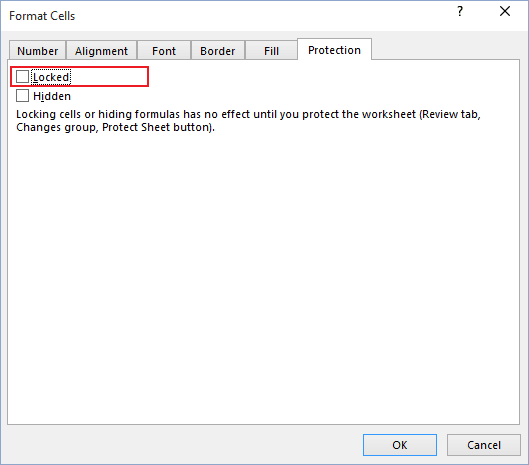
3. On the Protection tab, clear the Locked check box, and then click OK:

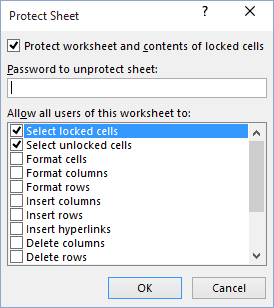
4. To protect the entire spreadsheet to have the lock feature protect the cells, on the Review tab, in the Changes group, click Protect Sheet:

5. Enter a password if you want to require a password for "unprotecting" the spreadsheet.

See also Protect Excel spreadsheet options.
6. Click OK.
Note: You can easily move between unprotected cells on a locked sheet by pressing the Tab key.
See also this tip in French: Comment verrouiller des cellules dans une feuille de calcul.

