Transform text for Table of Contents or Table of Figures
- To combine two- or three- lined headings into one line:
- Of the Table of Contents:

- Of the Table of Figures:

- Of the Table of Contents:
- To include the part of the text in headings, captions, or regular paragraphs:

- To use the Style Separator:

Combine two- or three- lined headings into one line of the Table of Contents
A Table of Contents, same as a Table of Figures, includes all specified levels of headings (and other styles, if specified). So, if you have two or more lines of the same style, such as Heading 1, Word includes them as separate lines in the Table of Contents or Table of Figures:
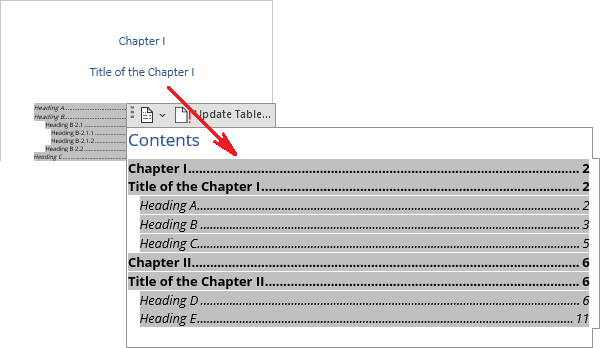
To include two- or three- lined headings in one line of the Table of Contents or Table of Figures, do the following:
1. Position the cursor at the end of the first line of the heading or title.
2. Press Shift+Enter to insert the new line break instead of the new paragraph break:

or

With and without special characters displayed, the heading and title look the same with the same line spacing settings (see how to change the line spacing).
See how to display special characters in a Word document for more details.
Notes:
- Do not forget to remove the new paragraph break between two lines if it exists.
- Do not forget to place at least one space character at the end of the first line to separate sentences of these paragraphs.
Include the part of the text in headings, captions, or regular paragraphs
When you need to include some parts of the paragraphs in a Table of Contents, you can select this text and apply the Heading or custom style. Then, include the style in a Table of Contents:
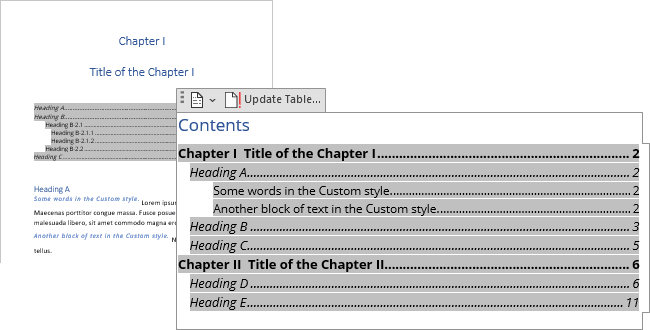
See how to include the text with some style to the Table of Contents.
There are some difficulties when working with styles:
- When you try to concatenate two or more paragraphs with different styles by deleting the paragraph break, Word applies the style of the first paragraph to the following paragraphs:

- Word includes only paragraphs in a Table of Contents that begin with the specified style. So, if you have a custom style in the middle of the paragraph, Word ignores it for the Table of Contents.
If you want to add some parts of the paragraph to the Table of Contents, do one of the following:
- If you need to include the first words or the first sentence of the paragraph, apply the specified Heading or custom style to that block of text.
- If you need to include the non-first words or sentence, you can divide the text into paragraphs and apply different styles to them (apply specified Heading or custom style for needed part of the text), then:
Apply the style to the existing first part of the paragraph
When you need to include in the Table of Contents the first sentence or first words of the paragraph, after typing or inserting it into the document content:
1. Select the words or the sentence you want to include in the Table of Contents.
2. Apply the style you will specify or already specified for the Table of Contents.
For example:
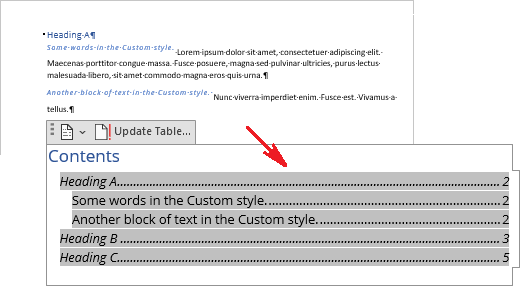
See how to create Table of Contents for non-predefined headings and Table entry fields, how to include custom, non-heading, or non-continuous heading styles for more details.
Use the hidden paragraph marks
One suggested way is to create a single paragraph from parts with different styles is to hide the paragraph marks (or pilcrows ¶) between these parts:

To hide the paragraph marks, do the following:
1. Display special marks in the document by pressing Ctrl+* (see how to display special characters in a Word document for more details).
2. Select the paragraph mark (¶) you want to hide.
3. Open the Font dialog box by one of the following:
- On the Home tab, in the Font group, click the dialog box launcher:

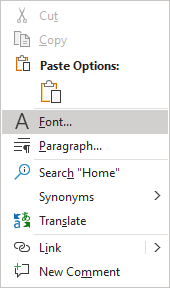
- Right-click and choose Font... in the popup menu:
- Press Ctrl+D.
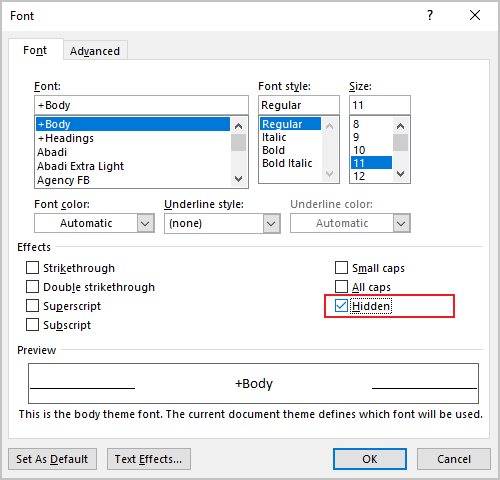
In the Font dialog box, on the Font tab, in the Effects section, select the Hidden check box, then click OK to apply settings:
Note: Instead of opening the Font dialog box, click Ctrl+Shift+H to apply the hidden text to the selection (see Shortcut Keys for formatting).
4. Repeat the steps above for all paragraph marks you want to hide:

Note: Be careful! If you want to print a hidden text in the document, these paragraphs will be separated in the printed version of the document. So, the pages and complete structure of the printed document and the document on your screen can look different.
Use the Style Separator
Microsoft Word offers one useful feature to connect paragraphs with different styles, named the Style Separator.
The Style Separator is a hidden paragraph mark that allows combining two pieces of text with different styles in one paragraph. Unlike manually hidden paragraph marks, Style Separators do not seriously change the document structure if you show or hide the hidden text in the documents.
You can insert two or more Style Separators in one paragraph:
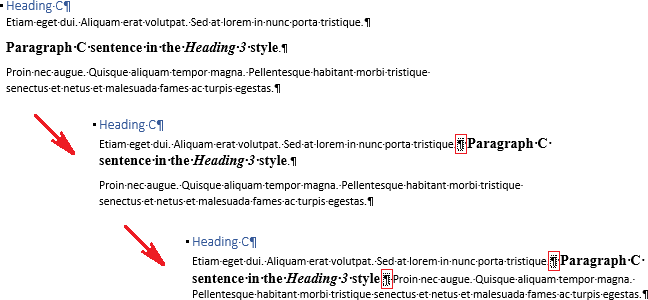
To insert a Style Separator in the document content, position the cursor anywhere in the first paragraph, then do one of the following:
- Click the Style Separator in your ribbon or the Quick Access Toolbar:
 or
or

Note: By default, that button is hidden; see how to add it to the ribbon and the Quick Access Toolbar.
- Press Ctrl+Alt+Enter.
Word adds the Style Separator right at the end of the current paragraph and adds the following paragraph without changing its style:

If needed, repeat inserting the Style Separator to add the next paragraph. So, you will have one paragraph from two or more paragraphs with different styles:

Word includes the part of the new paragraph in the Table of Contents.
Notes:
- Do not forget at least one space character between parts of the new paragraph to avoid orthographic errors.
- If you delete a Style Separator, the entire paragraph takes over the formatting of the first part of the text.
