How to insert automatic numbers, captions, and cutlines for photos in Word
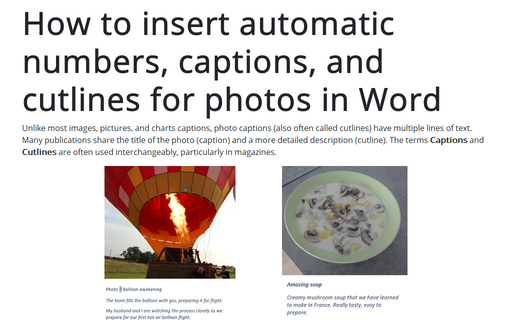
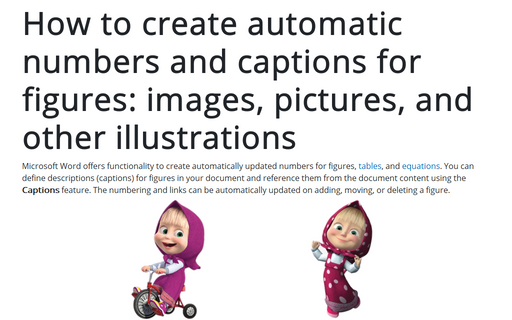
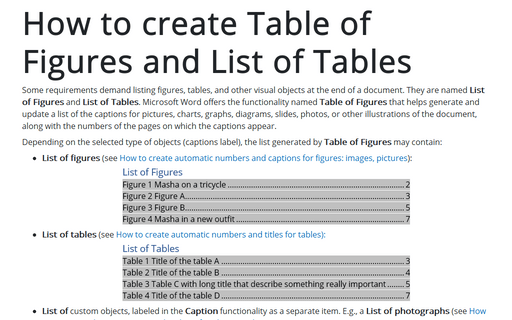
The caption requirements for a figure and a photo is are different because photographs usually attract more attention than the rest of the text in the document. Moreover, it is important to tell who is represented in the photo, when, where, and under what circumstances it was taken. Often, it is also important who made the photo, as well as some prehistory (or history) of the photo:
 and
and

Adding captions for a photo also provides you an opportunity to include additional information that you might not otherwise be able to include in the document.
Many guidelines describe what information and details order should be for good captions and cutlines. Most of them recommend:
- The caption (title) should introduce the photo and grab the reader attention,
- The cutline (description) should tell the reader names, stories, dates, places, significance (the 5W's and H who, what, when, where, even why, and how).
Attention! We highly recommend checking the formatting requirements, accepted by your college, university, company, or established on the project, etc.
Preparing a photo (optional)
Microsoft Word helps automate numbering but does not tie the caption to the object in any way. Like a regular paragraph, the caption cannot be moved easily “together” with the photograph. Also, it is not easy to leave all parts of the photo description on one page when editing, deleting, or formatting the document.
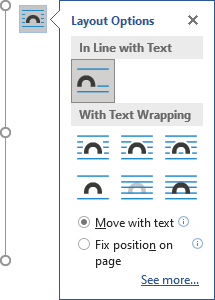
We recommend inserting photos as floating images (images with text wrapping) for grouping the caption text box with an image below.
Ensure one of the With Text Wrapping choices is selected (see Text wrapping in the Word document) to group a photo and its caption and cutline later.
Note: If you don't need photo numbering, skip the next step.
Insert a caption for photographs
To add automatically updated numbers and a title (caption) for a photo, select it and do one of the following:
- On the References tab, in the Captions group, click the Insert Caption button:

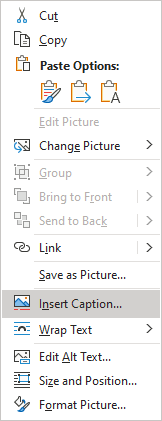
- Right-click on the selection and select the Insert Caption... in the popup menu:
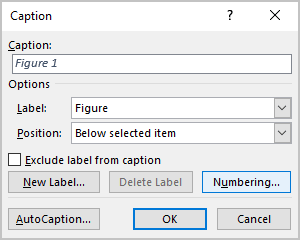
In the Caption dialog box:
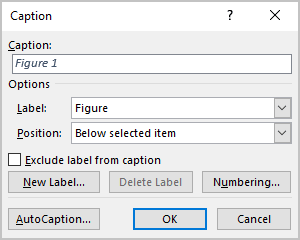
Select the label and its position
- Under Options:
- From the Label dropdown list, select the item type you need:

- Equation – see how to create captions for equations,
- Figure (selected by default) - see how to create captions for figures,
- Table – see how to create captions for tables,
- Another label (in this example, My Caption) was created using the New Label... button (see how to create a new label below).
Note: Remember that each type of object you labeled will be numbered sequentially within its group.
- From the Position dropdown list, select one of the options:

- Below selected item (selected by default for the Figure label), or
- Above selected item (selected by default for the Table label).
Notes:
- The document formatting requirements can regulate the caption's location for a photograph and any figure. Please check the requirements that you must follow.
- If you inserted a photo as a floating image (see the point Preparing a photo above), it would be easy to change the caption placement later.
- From the Label dropdown list, select the item type you need:
Exclude label from caption
- Select the Exclude label from caption check box if you don't need to add the label to the caption:

The option Exclude label from caption hides the label from being displayed in cross-references or a Table of Figures.
Add a new label
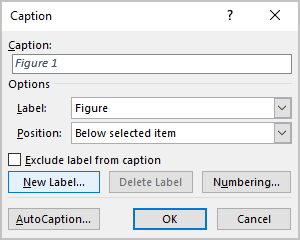
- Click the New Label... button to create a new label:
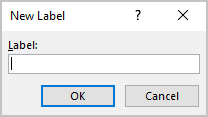
In the New Label dialog box, type a new label name:
Note: See also how to delete a custom label.
Modify caption numbering
- Click the Numbering... button if you want to change any of the numbering options:
In the Caption Numbering dialog box:
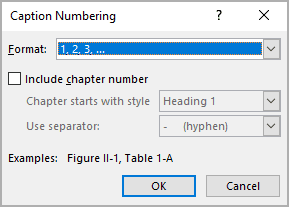
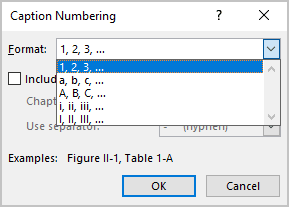
- In the Format dropdown list, select the numbering format you prefer:
- Select the Include chapter number check box to include the chapter number in the caption number. After selecting this option, two more options will be unlocked:
- From the Chapter starts with style dropdown list, select the heading level you need to include in the caption:
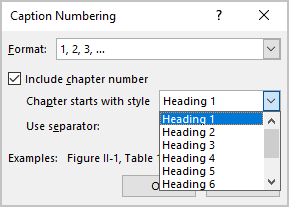
- In the Use separator dropdown list, select the punctuation you want to insert between the chapter number and the figure number:
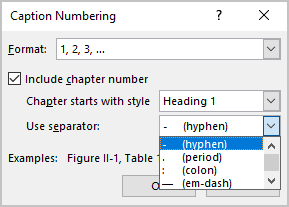
- At the bottom of the dialog box, see how your choices will look in the Examples section. E.g., “Figure 2.7” means the seventh figure in chapter 2.
- Click the OK button.
- From the Chapter starts with style dropdown list, select the heading level you need to include in the caption:
Note: See how to update caption numbering.
Add a description
- To add the text of your caption, click after the number and enter your text. E.g.:

Note: See how to edit and modify a caption.
Using an AutoCaption
See Adding captions with AutoCaption.
Add cutlines
As mentioned above, photographs have such a feature that their description contains more than one sentence and even more than one paragraph.
If you have a floating picture (photo with any of the wrapping text options):
- If you inserted a caption with numbering using the Caption dialog box, Word adds it as a separate text box:

- If you don't need numbering and skip steps for using the Caption dialog box, you need to add a text box with a caption.
To create a new text box, on the Insert tab, in the Text group, click Text Box:
 or
or

Select the Draw Text Box option in the drop-down list.
Click on the added text box, add a new line or paragraph, and add all text you need. See the differences in how to create a List of Figures.
See also how to change the Caption style.
Group a photo and its caption
Naturally, the photo and its description appear on the same page. To move objects as a single block, you need to group them by doing the following:
1. Select the floating photo (photo with any wrapping text options).
2. Hold down the Shift key and select a text box with the photo's caption and cutline:

3. Do one of the following:
- On the Shape Format tab, in the Arrange group, click the Group command:

- Right-click one of the objects and choose Group -> Group from the popup menu:
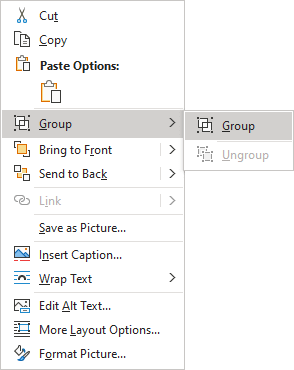
Word puts a single box around the objects instead of separate boxes around each object:

After these steps, a text should flow around the photo and its description, like one block. Also, the photograph, title, and description will stay together if you move them elsewhere on the page or document.
Delete a caption and an unnecessary label
If you need to remove some caption, select the caption paragraph (full line or several lines) and press Delete. Do not forget to update fields in the document!
To remove the unnecessary label, do the following:
1. Open the Caption dialog box.
2. In the Label dropdown list, select the label you want to remove.
3. Click the Delete Label to remove a custom label:
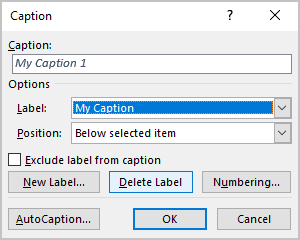
Note: You can't delete predefined labels: Equation, Figure, and Table.
See also edit or modify a caption.
We strongly recommend checking a document at least visually after changes!
