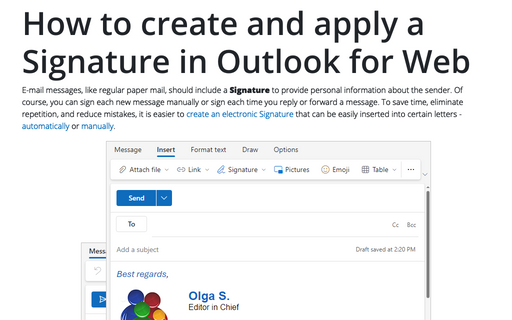
How to create and apply a Signature in Outlook for Microsoft 365 (Desktop)
In Outlook, you can set up several different signatures for different purposes. For example:
- You can create a signature that contains more information to send with initial email messages and a signature that contains less information to send with replies and forwards:

- You can create a formal business signature for correspondence with customers, a regular business signature for intra-office correspondence, and a personal signature for messages sent from another account.
Attention! Many people receive email on mobile phones and other devices that do not always recognize unusual formatting. So, it is best to use a simple signature. In addition, it is a good idea to use a short signature. It's not always fun to receive a signature that is longer than the message itself, or to receive obscure catchphrases or memes in every incoming message.
Create a new Signature in Outlook
To create a new signature (see also how to change the Stationery in Outlook), do one of the following:
- On the File tab, click Options:

In the Outlook Options dialog box, on the Mail tab, click the Signatures button:
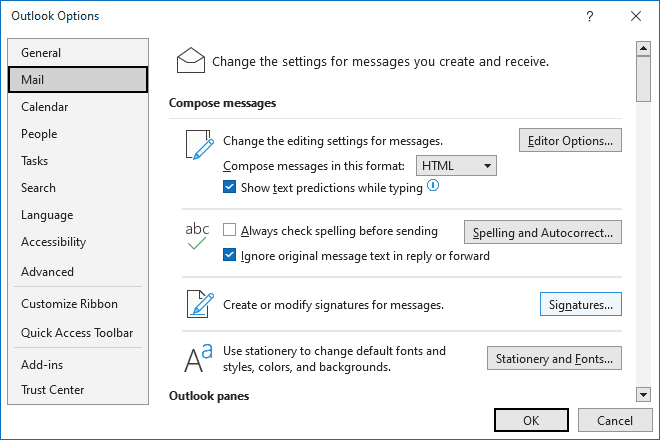
Note: You can easily open the Mail tab in the Outlook Options dialog box by right-clicking the Mail icon in the Navigation bar and choosing Options... in the popup menu:
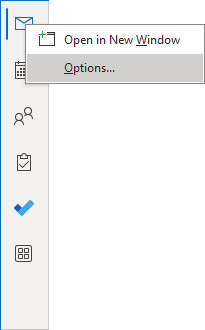 or
or
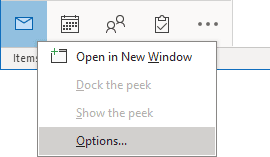
See more about customizing the Navigation bar in Outlook.
- Open a new message. On the Message tab, in the Include group, click Signature, and then click Signatures...:
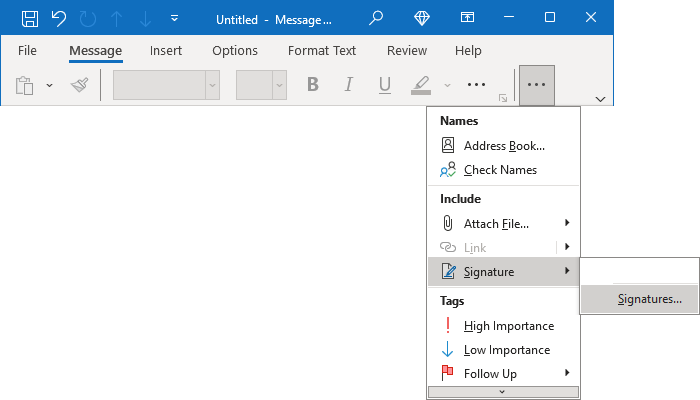
It can also look like this (if you use the Classic ribbon instead of Simplified; see more about customizing ribbons):
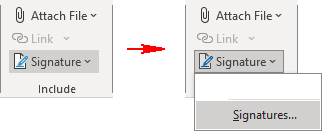
or

- On a message window, on the Insert tab, in the Include group, click Signature, and then click Signatures... (see examples in the apply a signature).
In the Signatures and Stationary dialog box, on the E-mail Signature tab:
- If needed, select the appropriate account from the E-mail account dropdown list:

- Click the New button:

In the New Signature dialog box, type the signature name you prefer, then click OK:

- Under Edit signature:
- Type any additional text you want to include, such as your name, the company name, and contact information.
You can enter more information in this box besides text, such as images, an electronic business card, a logo, etc.

- You can format the text of the e-mail signature in the same way that you format the text of your message. If you want to apply formatting that is not available from the buttons at the top of the Edit Signature section, such as padding, text wrapping around pictures, and graphics, you can:
- Create and format your signature in the E-mail Compose window or in another Microsoft application, such as Word or PowerPoint,
- Copy the signature, and then paste it into the Edit Signature section.
- Type any additional text you want to include, such as your name, the company name, and contact information.
- Click Save:

Assign automatic Signature
In the Signatures and Stationery dialog box, on the E-mail Signature tab, under Choose default signature, you can assign the signature you created to all new messages and all replies and forwards:
- To assign a signature to all new messages, from the New messages dropdown list, select the signature you need.
- To assign a signature to all response messages you send from the selected account, from the Replies/forwards dropdown list, select the appropriate signature:

If you want to turn off inserting any signature in new messages or your replies and forwards, select (none).
Click the OK button to apply the choices.
Modify or delete a signature
To edit, rename, or delete a signature (see how to add social links to your e-mail signature), open the Signatures and Stationary dialog box (see above how to open this dialog box).
In the Signatures and Stationary dialog box, on the E-mail Signature tab:
- If needed, select the appropriate account from the E-mail account dropdown list.
- In the Select signature list, select the signature you need to modify or remove.
To edit the selected signature, under Edit signature, make changes for the selected signature, then click the OK button to apply changes:

To rename the selected signature, click the Rename button, then change the name in the Rename Signature dialog box and click OK:

To delete the selected signature, click the Delete button. In the Microsoft message, click OK to delete the signature:

Apply a Signature manually
If you set a signature as the default in the Signatures and Stationary dialog box, it will be automatically added to the appropriate message type (new messages and/or replies and forwards).
To add a signature to a message manually, on the Message or Insert tab:
- If you use the Simplified ribbon (see more about customizing ribbons), click the Signature, then select the signature you want to insert:

- If you use the Classic ribbon, in the Include group, click Signature, then select the signature from the dropdown list:
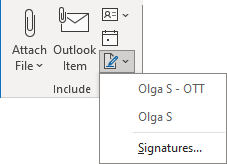 or
or
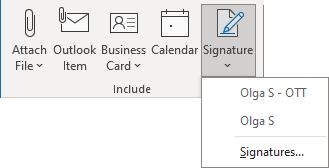
Outlook inserts the selected signature at the end of the message, replacing any existing email signature.
To remove an email signature from a message
Select and delete the signature content on the message as you would any other message content.
To backup and restore Outlook signatures
If you need to transfer your Microsoft Outlook settings to a new computer or a different Windows profile, you must perform a manual backup.
The easiest way to transfer signatures is to use HTML signatures in Outlook's signature settings, as described earlier.
In addition to this approach, you can copy files created by Outlook.
To copy, share, or transfer the email signature files, follow these steps:
1. In Outlook, do one of the following:
- On the File tab, click Options, then in the Outlook Options dialog box, open the Mail tab.
- Right-click the Mail icon in the Navigation bar and choose Options... in the popup menu.
2. Hold the Ctrl button, then in the Outlook Options dialog box, on the Mail tab, click the Signature... button.
Outlook opens the Signatures folder of Windows Explorer, where Outlook keeps the signatures:

Usually, this folder is in the following location:
C:\Users\
Each signature created via Outlook will exist in 3 different formats:
- Plain Text (txt),
- HTML (htm),
- Rich Text (rtf).
Additionally, each signature has a folder with the same name - these folders also contain images.
To restore signatures, you can simply copy them from the backup to the Signatures folder. Once the signatures are restored, they are available directly in Outlook in the Signatures and Stationery dialog box. However, if you have assigned them to a specific account by default, you must reassign them.
See also this tip in French: Comment créer une signature.

