How to insert an equation with matrix
Do the following (how to add an equation in your document, see Working with Microsoft Equation):
In the Professional presentation:
1. Create your own equation.
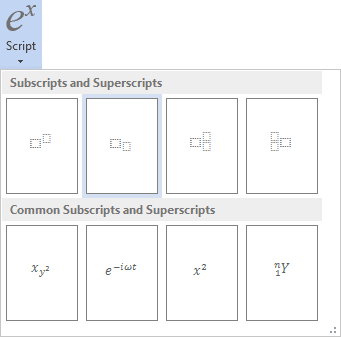
2. On the Equation Tools Design tab, in the Structures group, click the Script button:

In the Script list choose Subscript:

3. In the base box of script enter F and in the lower right box of script:
- On the Equation Tools Design tab, in the Symbols group, click the More button:

- In the list of symbols choose
 and then
  .
.
4. Enter =.
5. On the Equation Tools Design tab, in the Structures group, click the Bracket button. In the Bracket list choose round brackets:

6. On the Equation Tools Design tab, in the Structures group, click the Matrix button. In the Matrix list choose 2x2 Empty Matrix or 3x3 Empty Matrix:

7. To increase a count of columns or/and rows of your matrix, you can right-click in it and in the popup menu in the Insert list, choose what and how you want to increase:

8. Enter in some positions zero, for other positions use Subscript and Fraction:

In the Linear presentation:
1. In your own equation enter F_.
2. On the Equation Tools Design tab, in the Symbols group,
choose ![]() (or
\alpha) and then
(or
\alpha) and then ![]() (or \beta).
(or \beta).
3. Enter =. Then you enter an equal symbol, this linear formula transformed to the professional format:
4. In the brackets, enter the following:
(\matrix(0&E_x/c&E_y/c&E_z/c@(-E_x)/c&0&-B_z&B_y@(-E_y)/c&B_z&0&-B_x@(-E_z)/c&-B_y&B_x&0));
where \matrix is a command to create a matrix, & divides elements to columns in one row, @ divides rows in the matrix. Every time then you enter special symbol, this linear formula transformed to the professional format.
Note: You can change spaces and alignment of your matrix, for more details see Adjusting spacing and alignment in an equation.


