Read and Unread email messages

However, if you use the Reading Pane in Outlook for Windows to view messages instead of open them (see more about Reading Pane), you have several options for marking e-mails as Read.
You can also manually switch messages as Read or Unread in Outlook for Windows and Outlook for Web.
Read and Unread options the Reading pane in Outlook for Windows
When you're working in Outlook for Windows, follow these steps to modify or change the Reading Pane settings:
1. Open Reading Pane by doing one of the following:
First way:
- On the File tab, choose Options:

- Do one of the following:
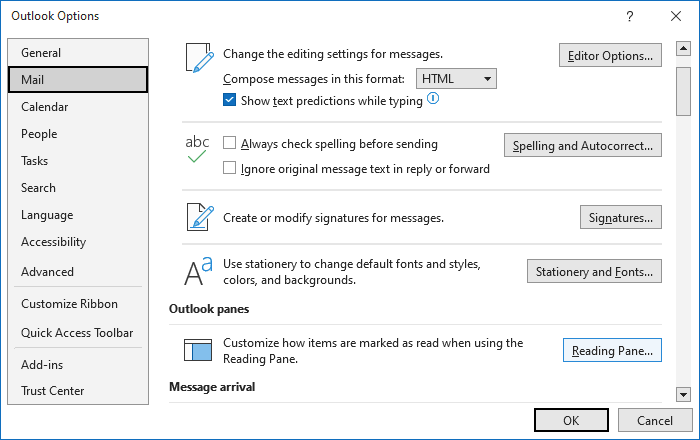
- In the Outlook Options dialog box, open the Mail tab.
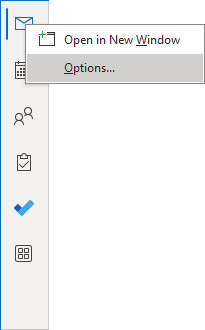
Note: You can easily open the Mail tab in the Outlook Options dialog box by right-clicking the Mail icon in the Navigation bar and choosing Options... in the popup menu (see more about customizing the Navigation bar in Outlook):
 or
or
In the Outlook Options dialog box, on the Mail tab, click the Reading Pane... button:
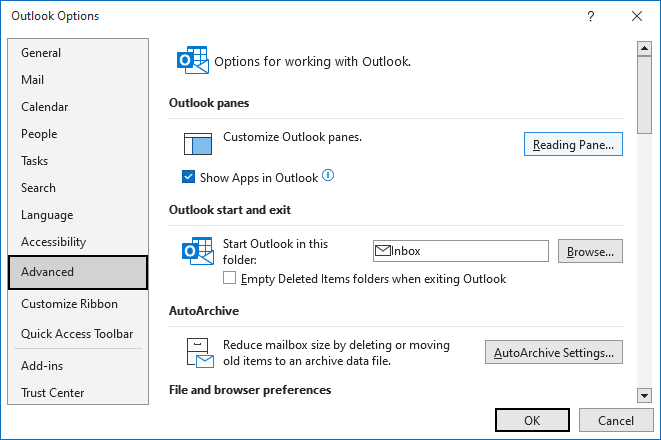
- In the Outlook Options dialog box, open the Advanced tab.
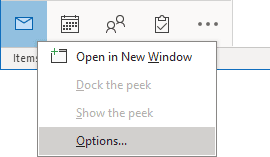
Note: You can easily open the Advanced tab in the Outlook Options dialog box by right-clicking the More Apps icon in the Navigation bar and choosing Options in the popup menu:
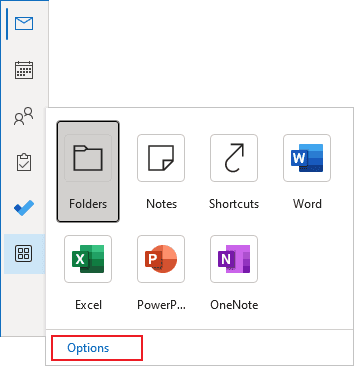
In the Outlook Options dialog box, on the Advanced tab, click the Reading Pane... button:
- In the Outlook Options dialog box, open the Mail tab.
Second way:
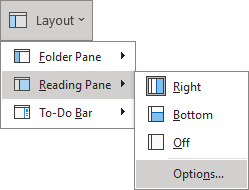
- If you use the Simplified ribbon (see more about customizing ribbons), on the View tab, click the Layout button (if you don't see it on the ribbon, click the More commands button - three points to the very right of the ribbon buttons), then select Reading Pane -> Options...:
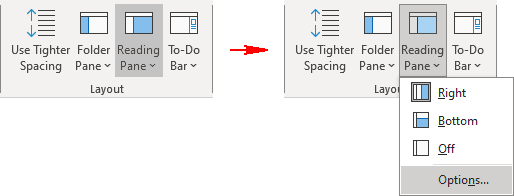
- If you use the Classic ribbon, on the View tab, in the Layout group, click the Reading Pane button, then choose Options...:
2. In the Reading Pane dialog box:

- If the Mark items as read when viewed in the Reading Pane checkbox is not selected (default), the email will not be marked as Read only when viewed, not when opened.
If the Mark items as read when viewed in the Reading Pane checkbox is selected, Outlook will mark messages as Read when they have been selected after the specified number of seconds.
In the Wait {X} seconds before marking an item as read field, enter how many seconds Outlook should wait between the time you click a message in the Reading Pane and the time it is marked as Read. You can choose 0 to mark emails as read immediately after selecting.
- If the Mark items as read when selection changes checkbox is selected (default), the e-mail will be marked as Read when you select it.
If the Mark items as read when selection changes checkbox is not selected, Outlook doesn't change the Read / Unread status of the message when you select it unless you manually mark it as read or double-click the message to open it in its own window.
Read and Unread options in Outlook for Web
- Click on the
 Settings button in the upper right corner of the page:

or
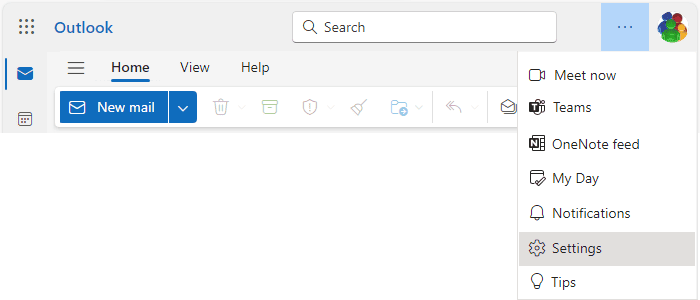
- On the View tab, click the Settings button:

In the Settings dialog box, on the Mail tab, in the Message handling group, under Mark as read, choose the option you prefer:

- Mark displayed items as read as soon as they're selected - the email message will be marked as Read when you view it, not when opened.
- Mark displayed items as read after 5 seconds - the email message will be marked as Read when viewed for at least 5 seconds.
- Mark displayed items as read when the selection changes (used by default) - the email message will be marked as Read when you select it.
- Don't automatically mark as read - the email massage can be marked as Read manually.
Mark messages as Read and Unread in Outlook for Windows
To mark a message as read or unread in Outlook for Windows, select the message or messages for which you want to change the status, then do one of the following:
- If you use the Simplified ribbon (see more about customizing ribbons), on the Home tab, click the Unread/ Read button (if you don't see it on the ribbon, click the More commands button - three points to the very right of the ribbon buttons):

- If you use the Classic ribbon, on the Home tab, in the Tags group, click the Unread/ Read button:

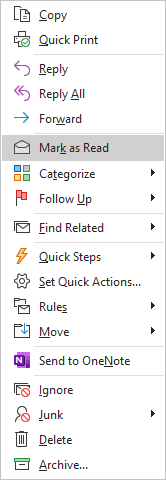
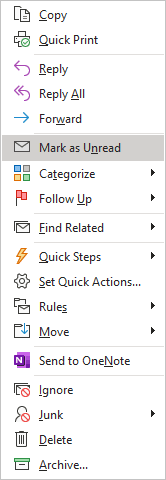
- Right-click the selection and choose Mark as Read or Mark as Unread in the popup menu:
- Use the shortcuts:
- Press Ctrl+U to mark the selection as Unread,
- Press Ctrl+Q to mark the selection as Read.
The message read/unread status is toggled.
Note: You can also hover over a message and click the read or unread indicator bar area:

Mark messages as Read and Unread in Outlook for Web
To mark a message as read or unread in Outlook for Web, select the message or messages for which you want to change the status, then do one of the following:
- If you use the Simplified ribbon (see more about customizing ribbons), on the Home tab, click the Read / Unread button (if you don't see it on the ribbon, click the More commands button - three points to the very right of the ribbon buttons):

- If you use the Classic ribbon, on the Home tab, in the Tags group, click the Read / Unread button:

- Click the Mark as read or Mark as unread icon in the message:

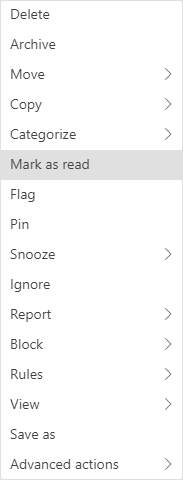
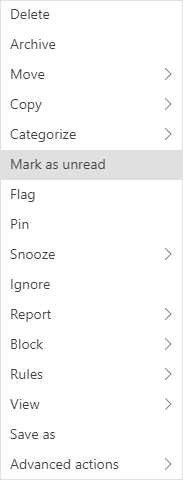
- Right-click the selection and choose Mark as read or Mark as unread in the popup menu:
- Use the shortcuts:
- Press Ctrl+Q to mark the selection as Read,
- Press Ctrl+U to mark the selection as Unread.
The message read/unread status is toggled.
Note: You can also hover over a message and click the read or unread indicator bar area:

Mark messages as Read when deleted
To organize you mailbox, Outlook offers one useful option to mark message as Read when you delete it. So, when you delete any Outlook item, it doesn't matter read or unread one, it marks as Read. To customize this option, do the following:
1. On the File tab, click Options:

2. In the Outlook Options dialog box, on the Mail tab, under Other:

- Select the Mark messages as read when deleted checkbox to mark all deleted items as read,
- Clear the Mark messages as read when deleted checkbox (default) to leave all items without changing their statuses when deleted.
See also this tip in French: Comment contrôler la manière dont le volet de lecture marque les courriers électroniques comme lus.

