Allow specific users to edit ranges in a protected spreadsheet
1. On the Review tab. in the Changes group, click Allow Users to Edit Ranges:

Note: This command is available only when the spreadsheet is not protected.
2. Do one of the following:

- To modify an existing editable range, select it in the Ranges unlocked by a password when sheet is protected box, and then click Modify.
- To delete an editable range, select it in the Ranges unlocked by a password when sheet is protected box, and then click Delete.
- To add a new editable range, follow next steps:
1. Click New to open dialog box:

2. In the Title box, type the name for the range that you want to unlock.
3. In the Refers to cells box, type an equal sign (=), and then type the reference of the range that you want to unlock. You can also click the Collapse Dialog button, select the range in the spreadsheet, and then click the Collapse Dialog button again to return to the dialog box.
4. In the Range password box, type a password that allows access to the range. The password is optional. If you don't supply a password, then any user can edit the cells.
5. Click Permissions to open dialog box:

6. Add users that you want to be able to edit the ranges or remove them, and then click OK three times.
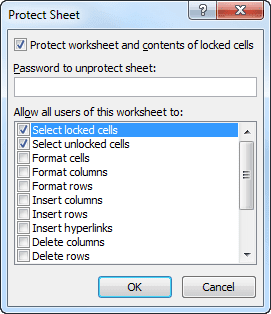
3. After all changes, in the Allow Users to Edit Ranges dialog box, click the Protect Sheet... button to open the Protect Sheet dialog box:

4. In the Allow all users of this worksheet to list, select the elements that you want users to be able to change (see Protect Excel spreadsheet options).
5. In the Password to unprotect sheet box, type a password for the sheet, click OK, and then retype the password to confirm it.
Note: The password is optional. If you don't supply a password, then any user can unprotect the sheet and change the protected elements. Make sure that you choose a password that is easy to remember, because if you lose the password, you cannot gain access to the protected elements on the spreadsheet.


