How to create a contact group in Outlook
There is no limit to the number of contacts you can add to the email group after Outlook 2007.
To create a new Contact Group, do the following:
1. Open the Contact Group dialog box to create a new distribution list for Outlook by doing one of the following:
- In the Contacts view, on the Home tab, in the New group, click the New
Contact Group button:

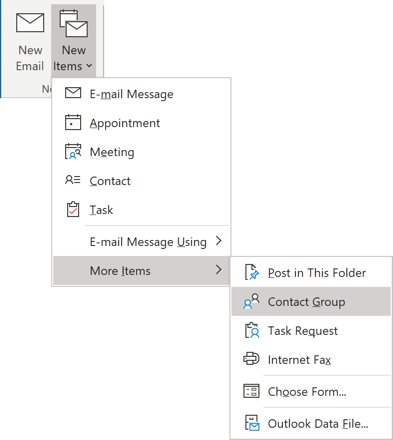
- In any other view, on the Home tab, in the New group, click the New Items
button and then choose More Items -> Contact Group:
- Press Ctrl+Shift+L (a helpful shortcut for those who need to create dozens of email lists).
2. In the Contact Group dialog box:

- In the Name field, enter the desired name for the email group (the name can contain spaces).
- On the Contact Group tab, in the Members group, click the Add Members list and
then choose how you can add the member:
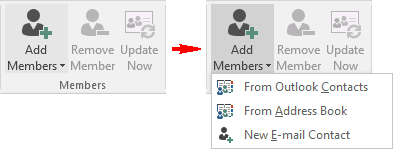
- If you want to add an existing member From Outlook Contacts or From Address
Book, do the following:
- In the Address Book drop-down list, click the address book that contains the
email addresses that you want to include in your Contact Group:
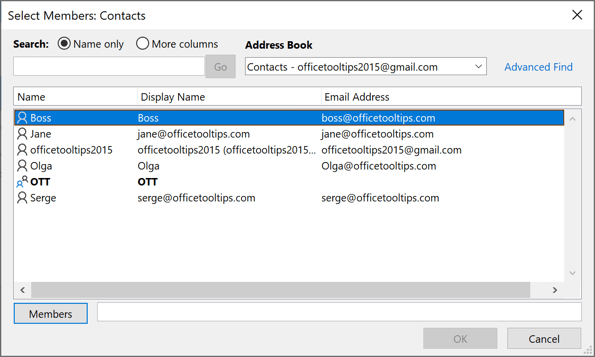
- In the list of names, click on the names that you want to add, and then click Members.
You can add names from different address books to the same Contact Group in Outlook.
- In the Address Book drop-down list, click the address book that contains the
email addresses that you want to include in your Contact Group:
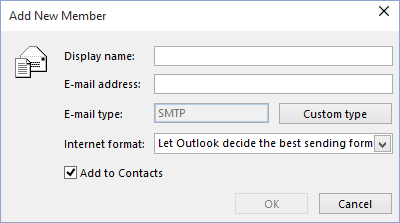
- If you need to add a New E-mail Contact, enter the information for the person from
the distribution list in the
Add New Member dialog box:
- If you want to add an existing member From Outlook Contacts or From Address
Book, do the following:
3. When you've finished adding contacts to the Contact Group, on the Contact Group tab, in the Actions group, click the Save & Close button:

Now, you can send an email to contact list, email group, or distribution list in a few clicks:
- Create a new email message.
- In the To, Cc, or Bcc field, start typing the name of the contact group and use auto-complete, or click the To, Cc, or Bcc button before the address field and select the name of the email group from the list.
Thanks to the contact groups, you can treat a bunch of contacts like a personal contact list, an internal email group, or a public distribution list as if they are a single contact. Moreover, if you use the Bcc field, your recipients receive your message as a regular email message and are not able to see other contact group members.
See also how to export all Contacts from Microsoft Exchange OST file storage to Microsoft Storage PST file.
See also this tip in French: Comment créer un groupe de contact.

